Ever recorded an amazing vocal performance only to realize in horror that the audio sound distorted?
It's frustrating.
What you experienced is audio clipping, but the good news is it's pretty easy to avoid:
You can avoid audio clipping with proper gain staging and mic placement. Record vocals at an average of -18dB, don't sing directly into the microphone, and stand 5-8 inches away from the microphone when recording vocals.
What Is Audio clipping?
Clipping is a form of waveform distortion that occurs when an audio signal is pushed past what a recording device can handle. A signal above 0dBFS in your recording software will be eliminated, clipping off the top of the waveform, creating an unpleasant distorted sound.
Clipping can occur if your microphone is turned up too high for the vocal you're recording.
Sure, you could use clipping as a creative effect, but in general, the distortion caused by digital clipping isn't a pleasant sound.
It's much better to record a crisp, clean vocal first, and then you can always add distortion later with plugins in your DAW.
how to set gain levels for recording
Gain is used to adjust the strength of an audio signal and it can be found on most audio interfaces, mixer boards and digital audio workstations.
The gain should not be confused with the volume because gain is the decibel input of a system (or signal strength), whereas volume is simply the decibel output of a sound system.
In other words, while the gain adjusts the audio signal strength, all the volume does is just adjust the loudness of the signal as you hear it through your studio speakers or headphones.
Gain is input, volume is output.
So in order to avoid clipping while recording, make sure to set the gain relatively low.
If your interface has any LED light indicators on them, you don't want you don't want them hitting red at all, and I would avoid orange/yellow as well. Make sure, even while singing at your loudest, that you are in the green.
If your interface doesn't have an indicator, you can just monitor the meter inside your DAW.
When I helped to record artists in a commercial recording studio, our goal was to set the gain on the mixing console so that the loudest sounds were just "tickling amber". (Amber meaning the color of the meter not a person. Ha!)
This is what is known as "recording hot", and it's important in the analog world where you are working with gear that have noise floors. You want to record as loud as you can without clipping so that you get less noise.
And even if you do clip and get some distortion, analog distortion actually sounds pleasant, whereas digital does not.
So if you are working in a home studio and recording through an interface directly into your computer, you do NOT want to record hot.
So keep it in the green, as you can always turn up the volume later in the mix.
Create Pro-Mixes, Faster
Click below to download my free song-finishing checklist to help you create radio-ready songs without taking months to complete them.
What dB Level Should You Record Vocals At?
While you don't want to record too loud, you can also record with not enough gain as well. If you don't record your vocals with enough gain, then you can actually lose audio resolution.
Record vocals at an average of -18dB for 24-bit resolution. The loudest parts of the performance should peak at -10dB and be lowest at -24dB. This is ensures you capture the highest quality audio possible.
How to record vocals without audio clipping
Setting proper gain levels will go a long way toward helping you record great-sounding vocals without clipping, but there are a couple of other things to keep in mind.
Use A Pop Filter
While you might be safe from clipping by setting your gain levels so that your vocals are averaging -18dB in level, you could also have momentary peaks that go far above that mark and clip your audio.
One possible culprit of this are "plosives" ("P" and "B" sounds which can involve a blast of air hitting the microphone).
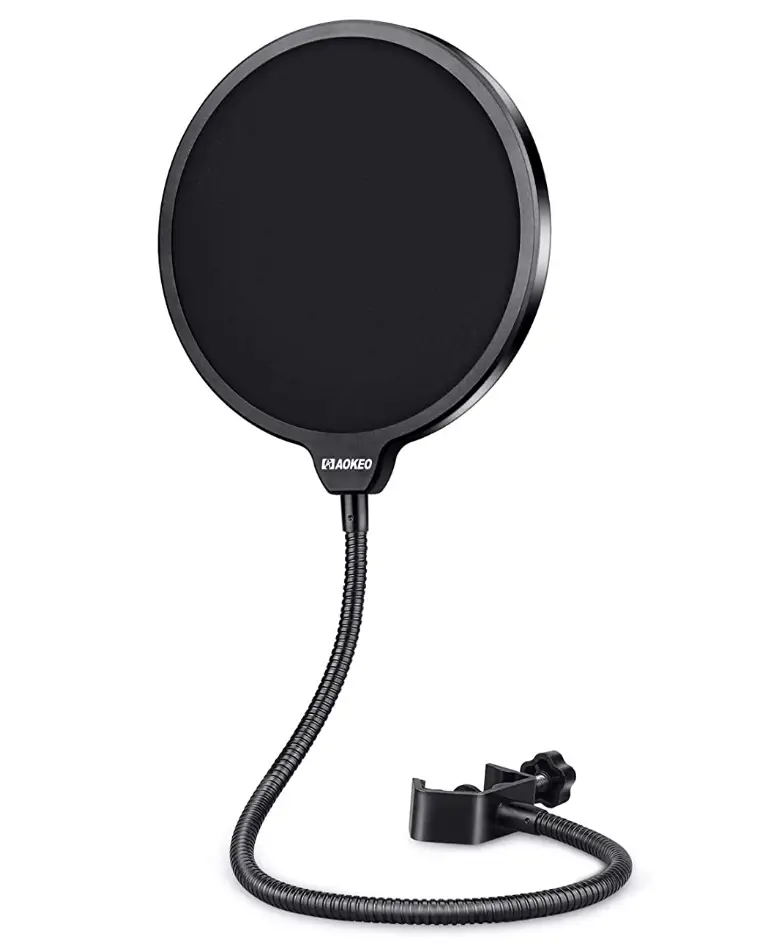
To cut down on plosives, use a pop filter.
A pop filter is a simple cloth or metal mesh that sits in front of the microphone and breaks up the air coming out of a vocalist's mouth and reduces plosives.
Don't Record Directly Into The Microphone
Another thing you'll want to do is avoid signing directly into the microphone.
It's a misconception that you need to sing directly into the microphone to get a great vocal, of course, this will depend on the microphone you're using.
If you are using a cheaper dynamic microphone, then you might need to sing more directly into the mic.
However, if you're using a large diaphragm condenser microphone (which is what I recommend for recording vocals) then you do NOT need to record directly into the mic.
Condenser microphones are very sensitive, which makes them great for picking up the details and subtleties of a vocal performance...
But their sensitivity also means you have to be more careful to not overwhelm them.
A pro tip, and something that often done in commercial recording studios, is to move the microphone up slightly so that it is at nose-level with the vocalist, rather than mouth-level.
This will ensure that all the air from the mouth is passing below the mic, and not going directly into it.
You can check out my video below which demonstrates how to position a microphone in front of a vocalist.
The key here is to make sure that the vocalist doesn't instinctually try to sing "up" into the mic.
Not only does this defeat the purpose, but will result in a poorer vocal performance as singing upwards is not an ideal singing stance.
Also Use Proper Distancing From The Mic
You also don't want to stand right in front of the mic. Using a pop-filter and moving the microphone upwards will naturally help with this.
But also keep in mind you want to keep your distance from the microphone (unless you are going for a deep and intimate-sounding vocal).
A good rule of thumb is standing 5-8 inches away from the microphone when recording, or even up to 12 inches away if you are recording a particularly loud performance.
Lean back when belting out a vocal
However, even with all of these measures taken, if your vocalist has to really belt out a certain section of a song, clipping can be a danger.
Another pro-tip here that the best vocalists will implement is leaning or stepping backward slightly when they sing at their loudest. That extra bit of distance can help protect the performance from clipping.
How To Fix Clipping vocals

If all else fails and you still end up with some clipped vocals, and you're not able to rerecord the performance, all is not lost!
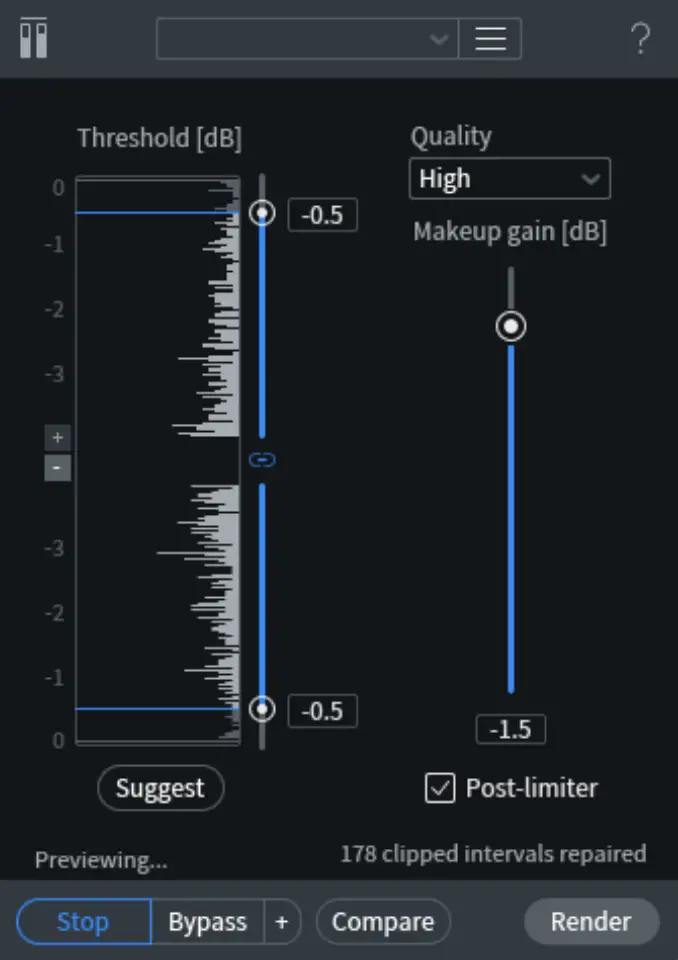
iZotope's RX tool is absolute MAGIC when it comes to repairing and cleaning up audio. It can do dozens of seeming impossible things when it comes to fixing audio, and one of them is fixing clipped vocals.
RX comes with a Declipper too (pictured above) which you can use to declip vocals in just seconds.
Simply pull the threshold down past the clipped section, adjust the make-up gain, and you're golden!
It's that easy, and you can't even tell your vocals ever clipped in the first place.
I use RX on just about every mix I do, and it's definitely one of my top 5 favorite music production tools.
Finish More Radio-Worthy Songs, Faster!
Recording clean vocals is just one piece of the puzzle when it comes to producing pro-quality songs.
If you want a proven step-by-step formula for mixing radio-worthy tracks from start-to-finish...
Create Pro-Mixes, Faster
Click below to download my free song-finishing checklist to help you create radio-ready songs without taking months to complete them.
This checklist will walk you through a proven step-by-step mixing and mastering process so that you don't ever have to guess or wonder what to do next.
You'll know exactly what to do, and when, so you can quickly mix, master, and finish more tracks.
I hope you found this post valuable on how to record vocals without clipping.
If so, feel free to share, and let me know in the comments below…

