What exactly is EQ, and how do you use it?
EQ stands for "equalization," and it is a term used to describe the process of adjusting the balance of audio frequencies in a sound signal. This can be done using an equalizer, which is a device or software tool that allows you to boost or cut the level of specific frequencies in the audio.
EQ is used in a variety of applications, including music production, live sound reinforcement, and audio post-production, to shape the tonal characteristics of a sound and make it fit better in a mix or to achieve a desired sound.
I remember when I was first starting to create music, and I had little idea of what an EQ was, or how to use it.
If you're a complete beginner, or a more experienced mixer looking for some EQ hacks and tips, this guide is for you!
Create Better Songs, Faster
Click below to download my free song-finishing checklist to help you create radio-ready songs without taking months to complete them.
What Is EQ and How Does It Work?

EQ is a tool that allows you to shape the tone or frequencies of sounds.
If you're not familiar with tone or frequency, or just not 100% certain what it is, then check out my article here.
An EQ works by decreasing (cutting) or increasing (boosting) the volume of specific frequencies in a sound.
How Do You Use An EQ?
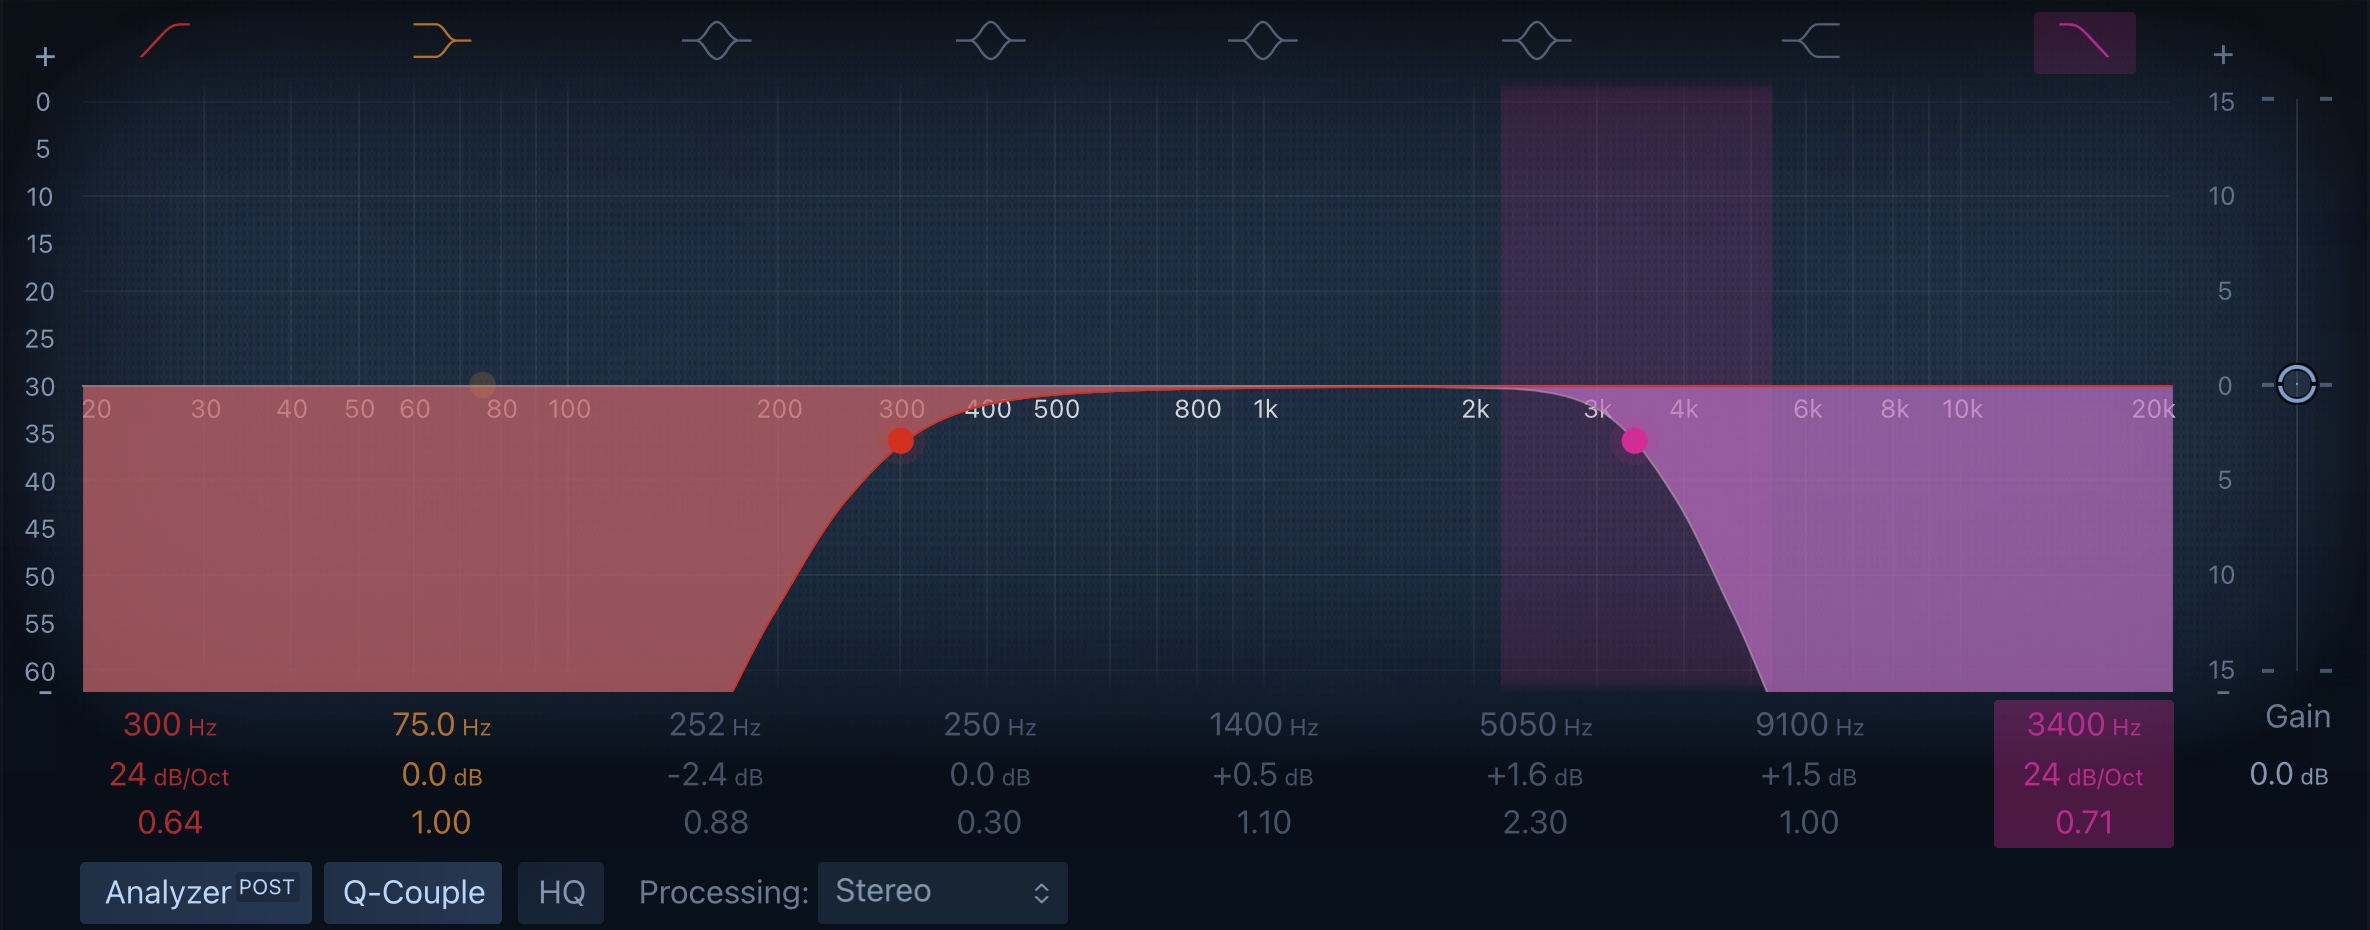
Though it may look complicated, using an EQ is actually pretty simple.
Frequency
First, select your desired frequency for cutting or boosting.
If you're using your DAW's stock EQ, you can simply move one of the dots up or down the frequency spectrum to locate the range you want to cut or boost.
Amount (dB)
Next, you choose how much you want to boost or cut in terms of volume (dB).
You can decide to just change the volume of that frequency by a small amount, or by a large amount.
Bandwidth (Q)
Finally, you choose bandwidth. How wide of a boost or cut are you going to make?
In other words, how big of a bite are you going to take (or add) to the cookie (frequency)?
You can choose to make a very narrow cut or boost, impacting only a small range of frequencies, or you can make a very large, sweeping boost or cut.
And of course, you can also make your bandwidth fall somewhere in the middle.
Common EQ Curves
You can create all kinds of EQ curves, but here are some of the most common ones.
Bell Curve
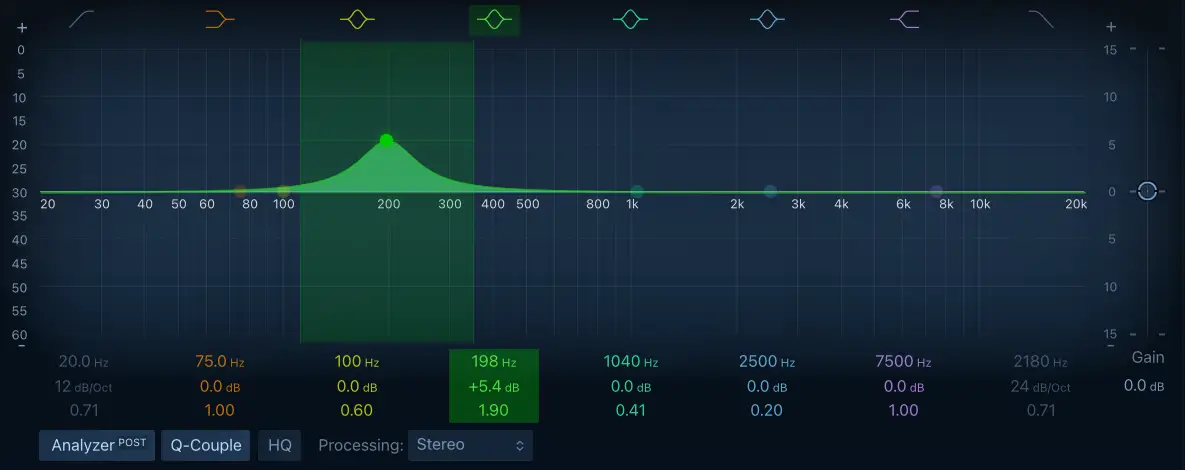
A bell curve in EQ refers to a type of EQ curve that allows you to boost or cut specific frequencies.
It's called a bell curve because it looks like a bell, with the highest point in the middle and then it tapers off on both sides.
This is different from other types of EQ where you can only adjust a certain frequency or boost or cut the overall sound.
With a bell curve, you can focus on a specific range of frequencies and make adjustments to that specific area.
It's great for making subtle changes to your audio, like bringing out certain instruments or making sure vocals sound just right.
High Pass Filter
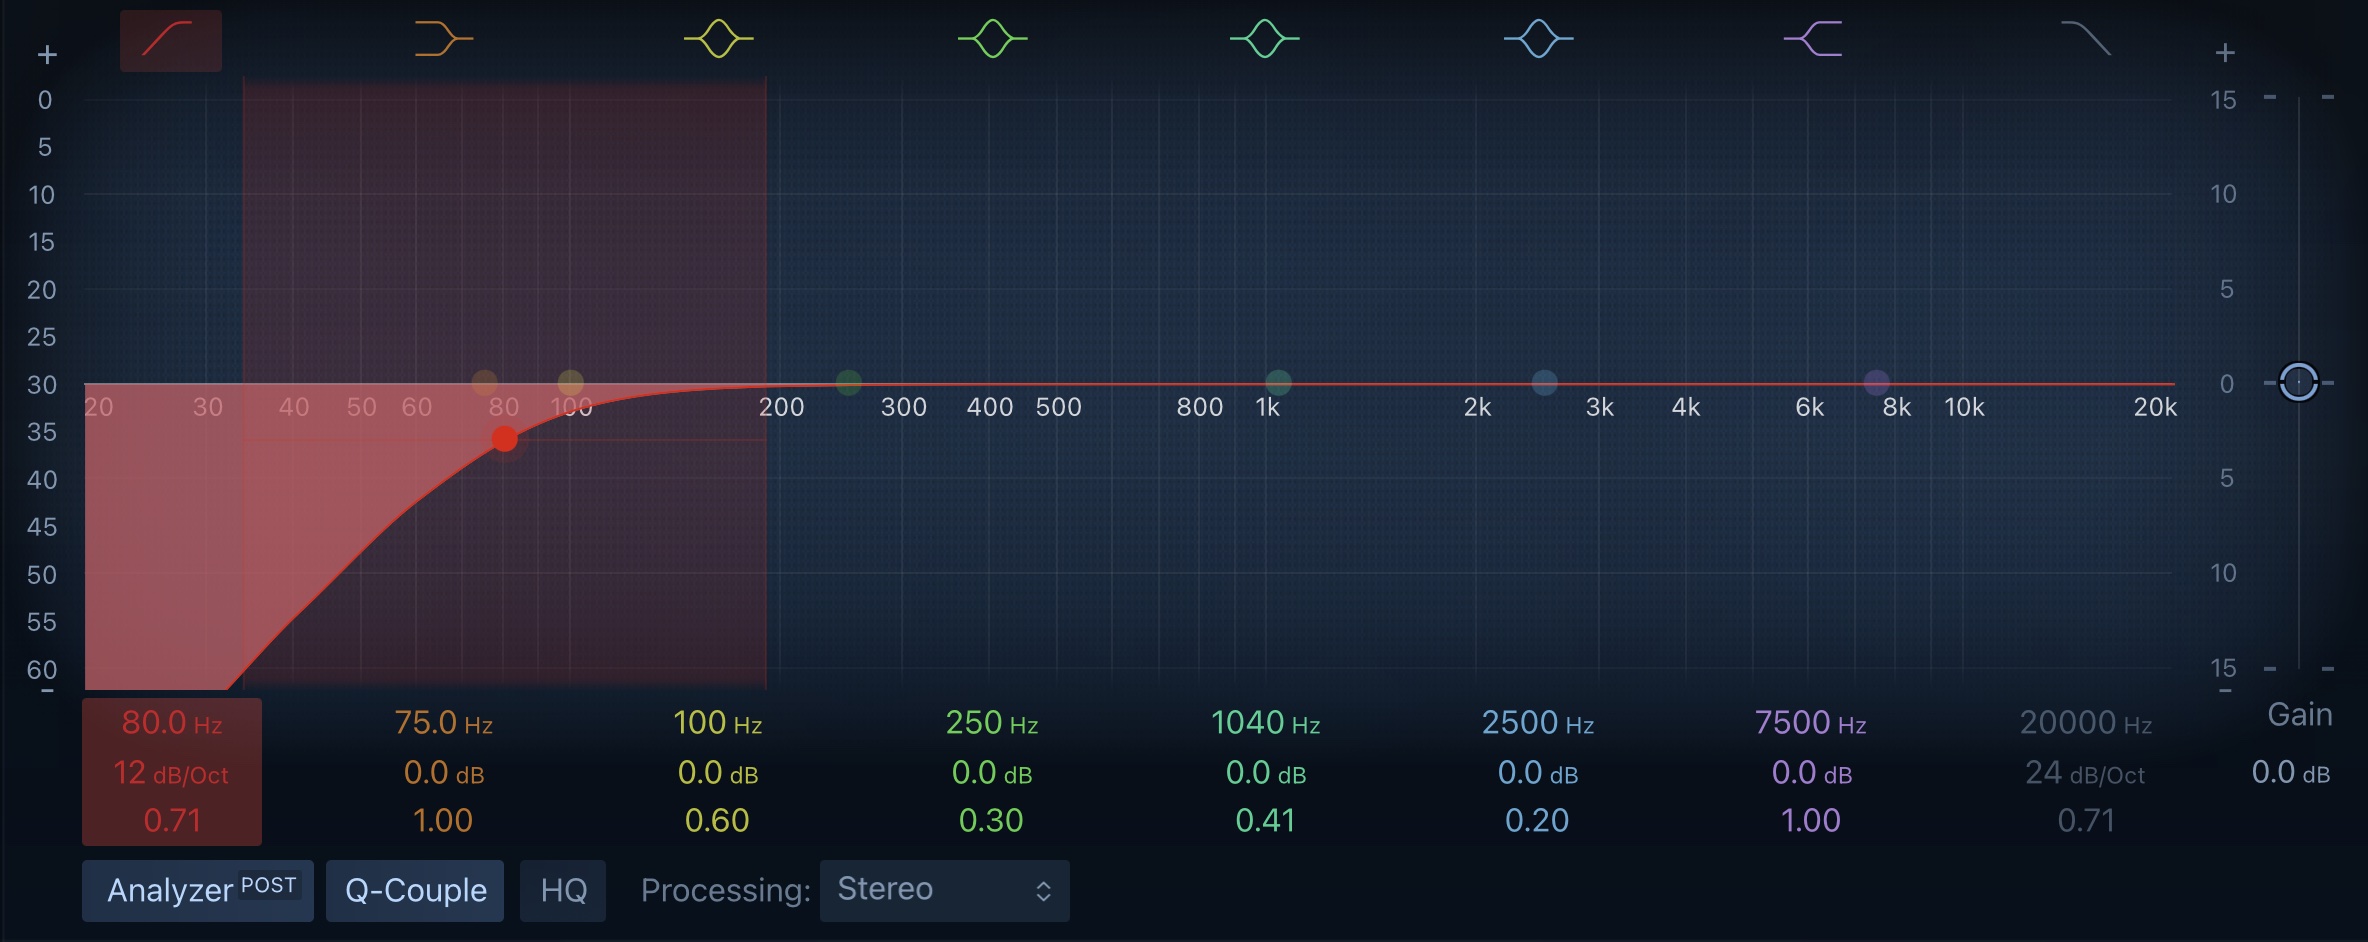
A high-pass filter is a type of filter that allows high frequency audio signals to pass through while attenuating or cutting low frequency signals.
This can be useful for removing unwanted low-frequency noise or for emphasizing the higher frequencies in an audio signal, such as vocals or high-hats in a music mix.
High-pass filters are often represented as a slope, with the steepness of the slope determining the rate at which the low frequencies are cut.
Low Pass Filter
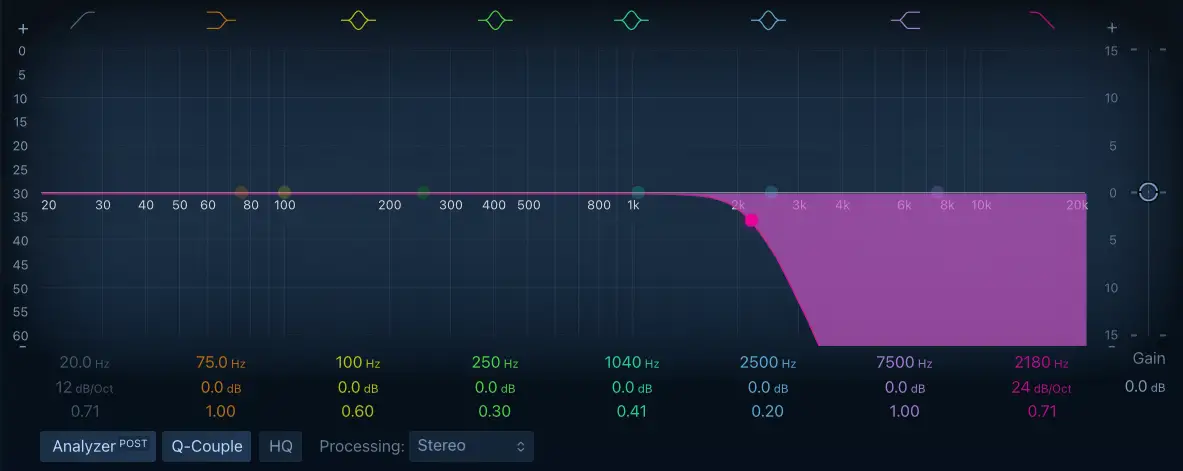
A low-pass filter is a type of filter that allows low frequency audio signals to pass through while attenuating or cutting high frequency signals. In other words, the inverse of a high-pass filter.
This can be useful for removing unwanted high-frequency noise or for emphasizing the lower frequencies in a audio signal, such as bass in a music mix.
Low-pass filters are often represented as a slope, with the steepness of the slope determining the rate at which the high frequencies are cut.
Band Pass Filter
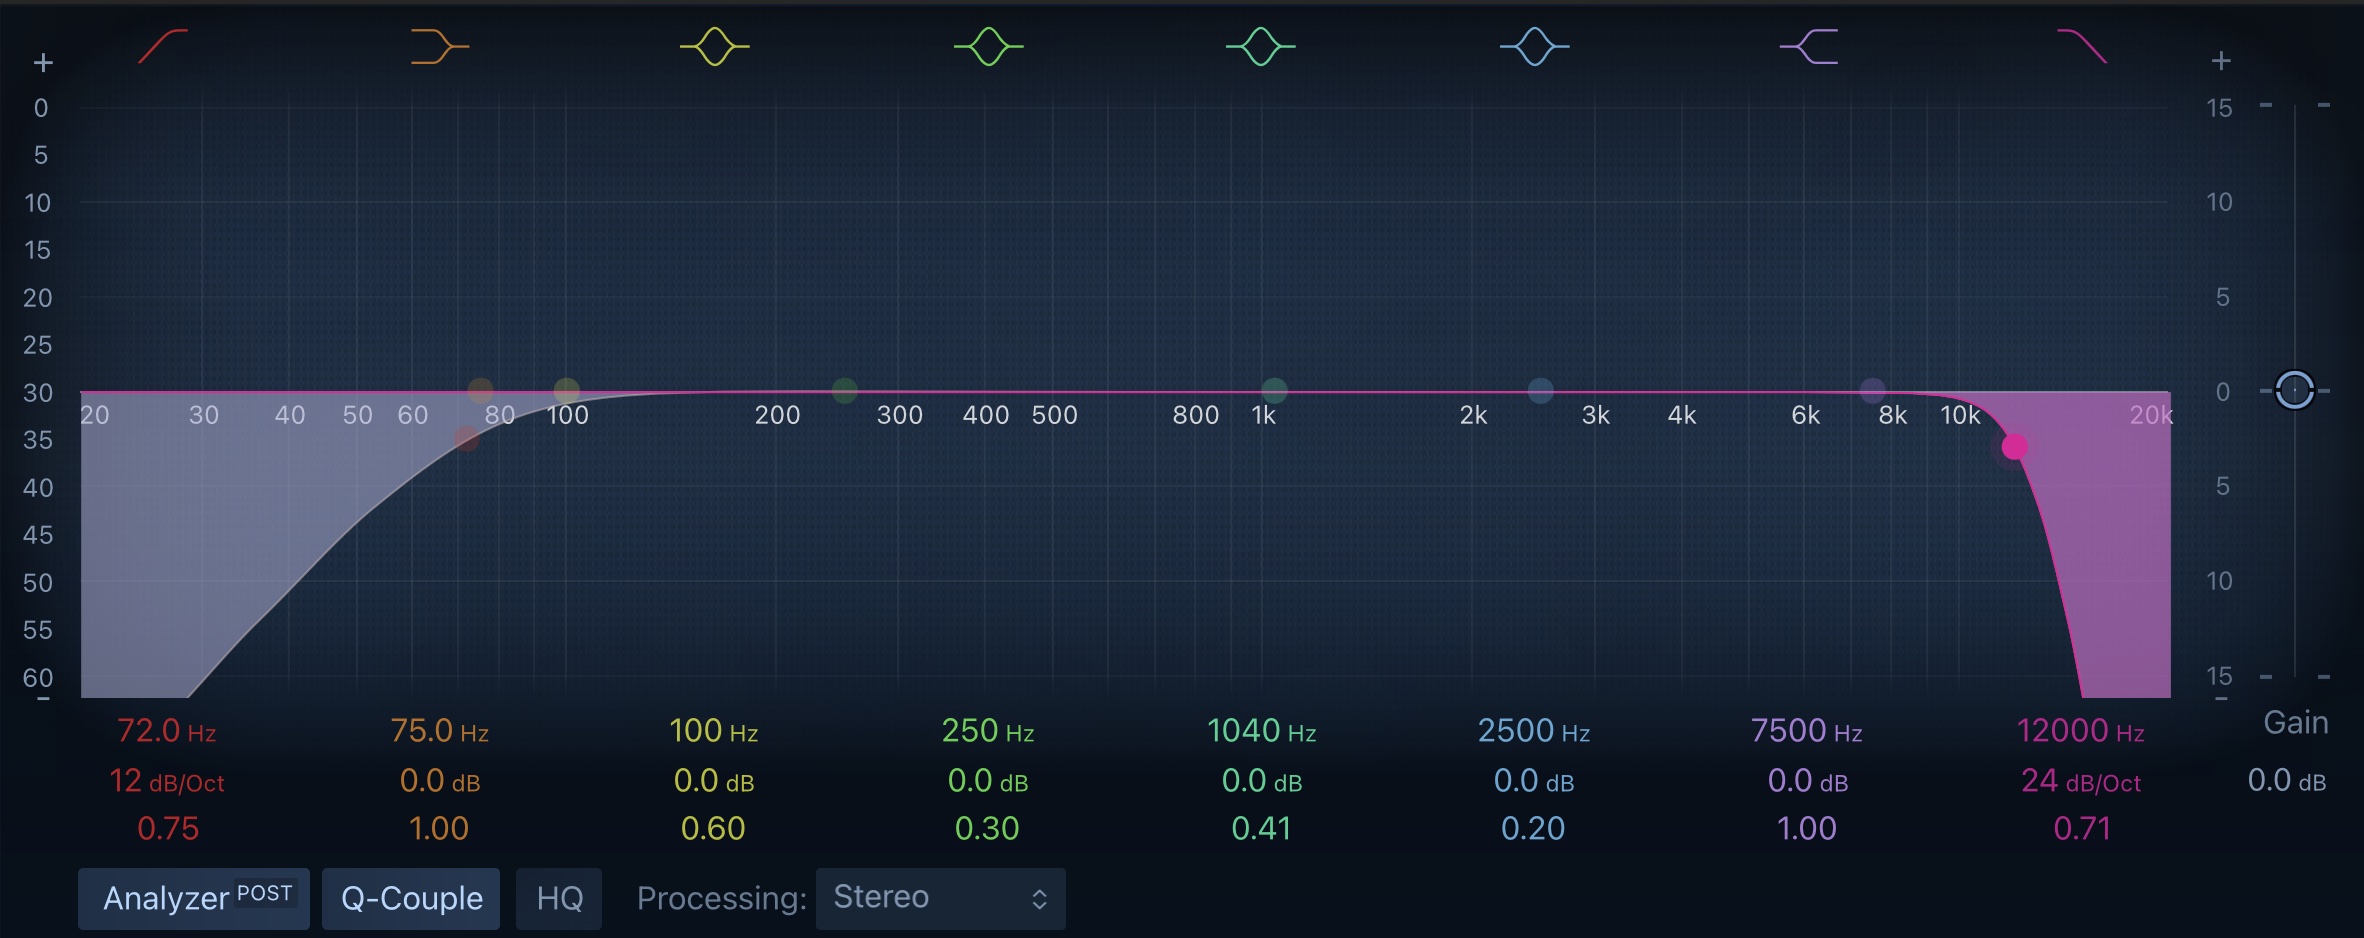
A bandpass filter in audio equalization is like a filter that only lets a specific range of frequencies pass through.
It's like a bouncer at a club (I think because I've never been to a club), but instead of only letting people with a certain look or ID pass, it only lets a certain range of audio frequencies through.
You can think of it as a combination of a low pass and high pass filter, where it cuts off the low frequencies and high frequencies, but only lets the frequencies in a specific range pass through.
This can be useful for isolating certain instruments or sounds in a mix, like a trumpet solo or a specific vocal line.
It also can be used for sound design and special effect where you want to create a certain frequency range.
EQ Cheatsheet Chart
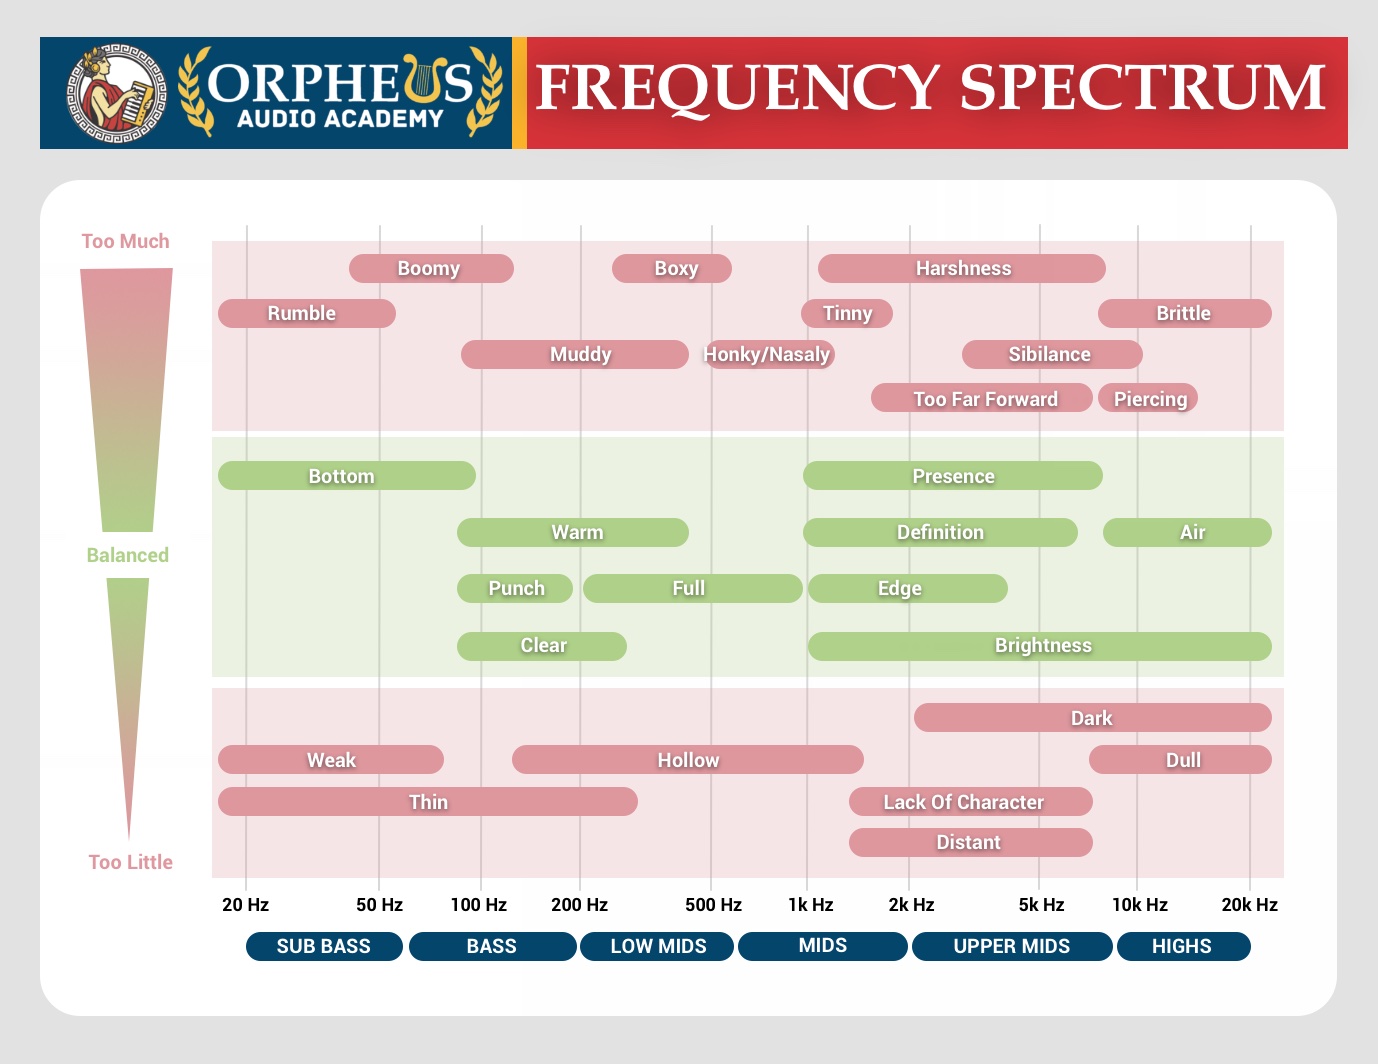
The frequency spectrum can be divided up into six distinct ranges, each one imparting different tonal character qualities to a sound.
The audio band can effectively be broken down into six distinct ranges, each one having an enormous impact on the tonal sound.
- Leon di Gar Kulka
Sub-Bass: 16 and 60 Hz
The very low bass, which encompasses sounds which are often felt more than heard, such as thunder in the distance. These frequencies give the music a sense of power even if they occur infrequently. Too much emphasis on this range makes the music sound rumbly and muddy.
Bass: 60 - 250 Hz
The bass contains the fundamental notes of the rhythm section so EQing this range can change the musical balance, making it fat or thin. Too much boost in this range can make the music sound boomy.
Low Mids: 250 - 600 Hz
The low midrange contains the low order harmonics of most musical instruments and can sound boxy and muddy if boosted too much.
Mids: 600 - 4,000 Hz
The midrange can introduce a telephone like quality to the music if boosted too much. Boosting the 500 to 1,000Hz range makes the instruments sound horn-like, while boosting the 1 to 2kHz range makes them sound tinny. Excess output in this range can cause listening fatigue.
The range between 2 and 4kHz can mask the important speech recognition sounds if boosted, introducing a lisping quality into a voice and making sounds formed with the lips such as "m", "b", and "v" indistinguishable.
Too much boost in this range, especially at 3kHz, can also cause listening fatigue.
Dipping the 3kHz range on instrument backgrounds and slightly peaking 3kHz on vocals can make the vocals audible without having to decrease the instrument level in mixes where the voice would otherwise seem buried.
High Mids (Presence): 4,000 - 6,000 Hz
The presence range is responsible for the clarity and definition of voices and instruments. Boosting this range can make the music seem closer to the listener. Reducing the 5kHz content of a mix makes the sound more distant and transparent.
Highs (Brilliance): 6,000 - 16,000 Hz
This range controls the brilliance and clarity of sounds. Too much emphasis in this range, however, can produce sibilance on the vocals.
4 Ways To Use EQ
There are essentially 4 ways to use EQ:
- Remove undesirable elements
- Enhance Pleasing Elements
- Change The Sound
- Make Space In The Mix
1. Remove Undesirable Elements
The first way to use EQ is to remove the frequencies you DON'T want in your sound.
One way to use EQ to remove undesirable frequencies from a sound is by using a filter to cut or reduce the level of a specific frequency range.
For example, if there is a low-frequency hum or rumble in a recording, you can use a low-pass filter (see above) to cut the frequencies below a certain threshold.
Similarly, if there is a high-pitched whine or hiss, you can use a high-pass filter to cut the frequencies above a certain threshold.
You can also use a specific band-pass filter to remove a certain range of frequencies. This can be done by adjusting the center frequency and bandwidth of the filter. By adjusting the Q value of the filter, you can make the filter more or less narrow, affecting the range of frequencies that will be removed.
There are a couple of specific tactics you can use to help with removing undesirable frequencies.
Tactic #1: The Sweep Method
Another way of using EQ to remove undesirable frequencies is by using a subtractive EQ, where you identify the specific frequency that you want to remove and then cut it by adjusting the gain of the EQ band.
This can be done by using a parametric EQ or a graphic EQ. You can use the EQ to boost a frequency, and then sweep through the frequency spectrum, hunting for harsh or annoying frequencies.
Once you've identified problem areas, you can then cut these frequencies.
Tactic #2: Use EQ Chart
You can also use the EQ cheatsheet chart above to identify problems. If your track sounds too muddy, look for the range in the frequency spectrum where muddy frequencies tend to emerge from.
Once located, simply cut that range.
It's important to keep in mind that when removing unwanted frequencies, you should do it carefully and by listening to the sound. You don't want to remove the desired frequencies or create other problems while trying to solve one.
2. Enhance Pleasing Elements
When you want to enhance pleasing frequencies in a sound source, you can use EQ to boost certain frequency ranges.
It's like turning up the volume of certain parts of the sound to make them stand out more.
For example, if you want to make the vocals in a song sound clearer and more prominent, you can boost the frequency range where vocals typically sit, around 2-4kHz.
Similarly, if you want to make the bass in a song sound more powerful, you can boost the frequency range around 60-120Hz.
It's important to listen carefully and make small adjustments, so you don't overdo it and create an unnatural sound. The key is to make adjustments that enhance the pleasing frequencies while maintaining the overall balance and integrity of the sound.
It can especially be a good idea to use an EQ plugin that emulates analog equipment when trying to sweeten a sound, as it can help to add some pleasing color to the sound as you are EQing.
3. Change The Sound
You can also use EQ to completely change a sound.
For example, if you add a low pass filter down to 3,000 Hz, and a high pass filter up to 300 Hz, you can recreate the sound of a telephone.
4. Make Space In The Mix
One of the most important uses for EQ is to make space in a mix.
This is done by cutting certain frequency ranges in the different elements of the mix so that each instrument/element has it's own place in the frequency spectrum.
Know where your kick drum will sit versus your bass, or where your piano will sit versus your vocals.
For example, if you have a lot of instruments or vocals competing for the same frequency range, you can use EQ to cut that frequency range on one or more of the elements. This can create more space and clarity in the mix, making it easier to hear all the different elements.
Another way to create space in a mix is by using a high-pass filter to cut the low-frequency range on elements that don't need it.
For example, you can use a high-pass filter on the vocals to remove any low-frequency rumble and make them sound more clear and crisp. This also allows your bass to shine and not become muddied.
You can also use the same technique on the instruments that don't need those low frequencies, like cymbals, which tend to have more high frequencies than lows.
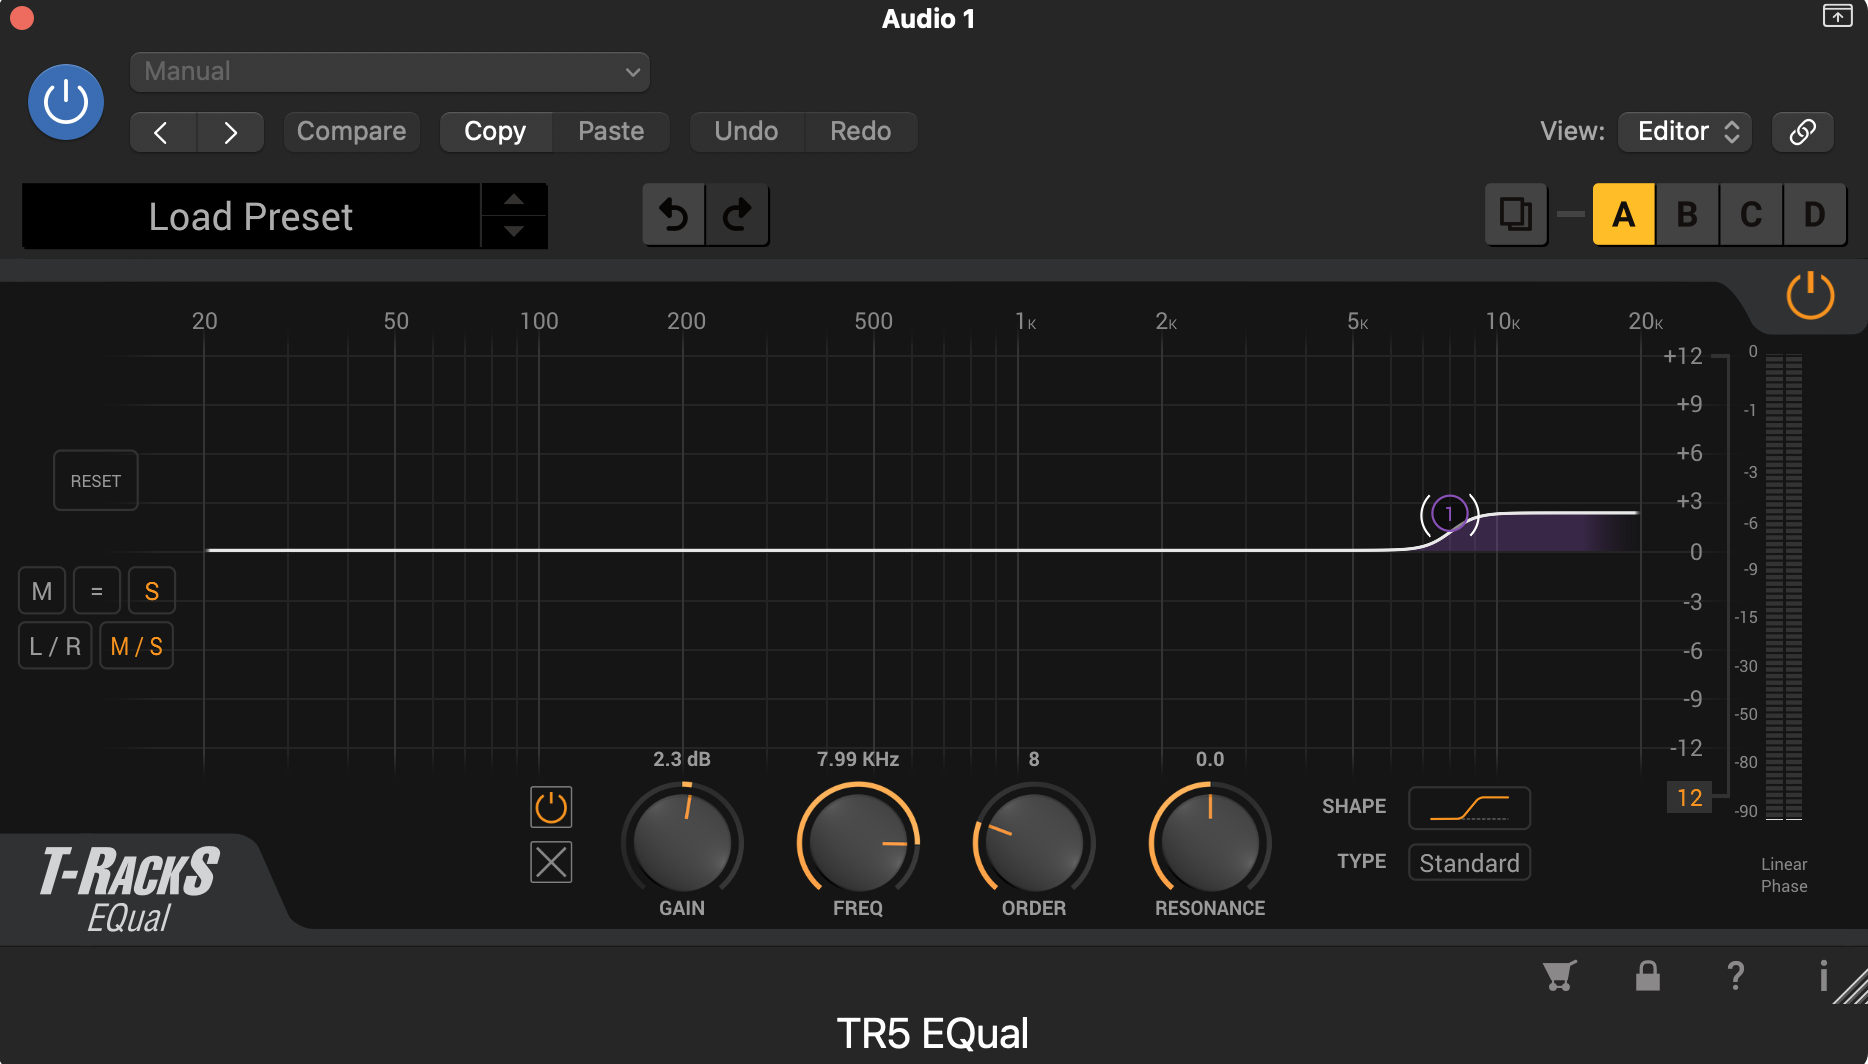
You can also use EQ to add space by using a mid/side EQ.
For example, you may not really need your high-hats to be heard down the middle of the stereo field, and having them there can cause them to clash with your vocals or other instruments.
However, you don't want to just cut those high frequencies and lose your high-hats either.
Instead, you can cut the middle range of the high-hats, and then boost the side frequencies using a mid/side EQ.
It's important to remember that when using EQ to create space, you should be subtle and listen carefully to the changes you are making. You don't want to remove too much of the important frequencies or create an unnatural sound.
The key is to make adjustments that create space while maintaining the overall balance and integrity of the mix.

Create Better Songs, Faster
Click below to download my free song-finishing checklist to help you create radio-ready songs without taking months to complete them.
The Best EQ Plugins
By the way, if you are looking for the best EQ plugins for taking your mixes to the next level, or making your life easier.
Then check out my list here of the 17 BEST EQ plugins on the market.
12 Pro EQ Tips
Now that you know the basics of EQ, here are 12 Pro EQ tips you can apply in your next mix to take it to the next level.
1. Have An Intention
When applying EQ while mixing music, it is important to have a clear intention for what you are trying to achieve. Here are some common intentions for using EQ:
Balancing: Use EQ to balance the levels of different frequency ranges in the mix. This can help to create a sense of clarity and definition in the mix.
Enhancing: Use EQ to enhance the tonal characteristics of a particular instrument or vocal. This can help to make it stand out more in the mix.
Fixing problems: Use EQ to fix problems such as boomy bass, harsh highs, or muddy mids. This can help to make the mix sound more polished and professional.
Creating space: Use EQ to create space in the mix. This can be done by cutting certain frequency ranges on certain instruments to make room for other elements in the mix.
Matching: Use EQ to match the tonal characteristics of different elements in the mix. This can help to create a cohesive sound and a sense of flow.
Emulating: Use EQ to emulate the tonal characteristics of a specific sound or genre. This can help to create a desired aesthetic for the mix.
2. Cut BEFORE Boosting
When using EQ while mixing music, it is generally better to cut before boosting for a few reasons:
1. Preventing Clutter:
Cutting frequencies before boosting can help to prevent the mix from becoming cluttered. If you boost certain frequencies first, you may find that you need to cut other frequencies to make room for them. Cutting first can help to create a sense of clarity and definition in the mix.
2. Avoiding Distortion:
Cutting frequencies before boosting can help to avoid distortion. If you boost certain frequencies first, you may find that they overload the mix and create distortion. Cutting first can help to prevent this from happening.
3. Conserving Headroom:
Cutting frequencies before boosting can help to conserve headroom. If you boost certain frequencies first, you may find that the levels of the mix become too high and you have less headroom to work with. Cutting first can help to preserve headroom and prevent the mix from becoming too loud.
4. Achieving a Natural Sound:
Cutting frequencies before boosting can help to achieve a more natural sound. If you boost certain frequencies first, you may find that the mix sounds artificial or over-processed. Cutting first can help to preserve a more natural sound.
However, it is important to note that this is not a hard rule, and sometimes it could be beneficial to boost before cutting. It's important to use your ears and to make EQ adjustments that will enhance the overall sound of the mix, rather than just one specific track.
3. Avoid Applying EQ In Solo
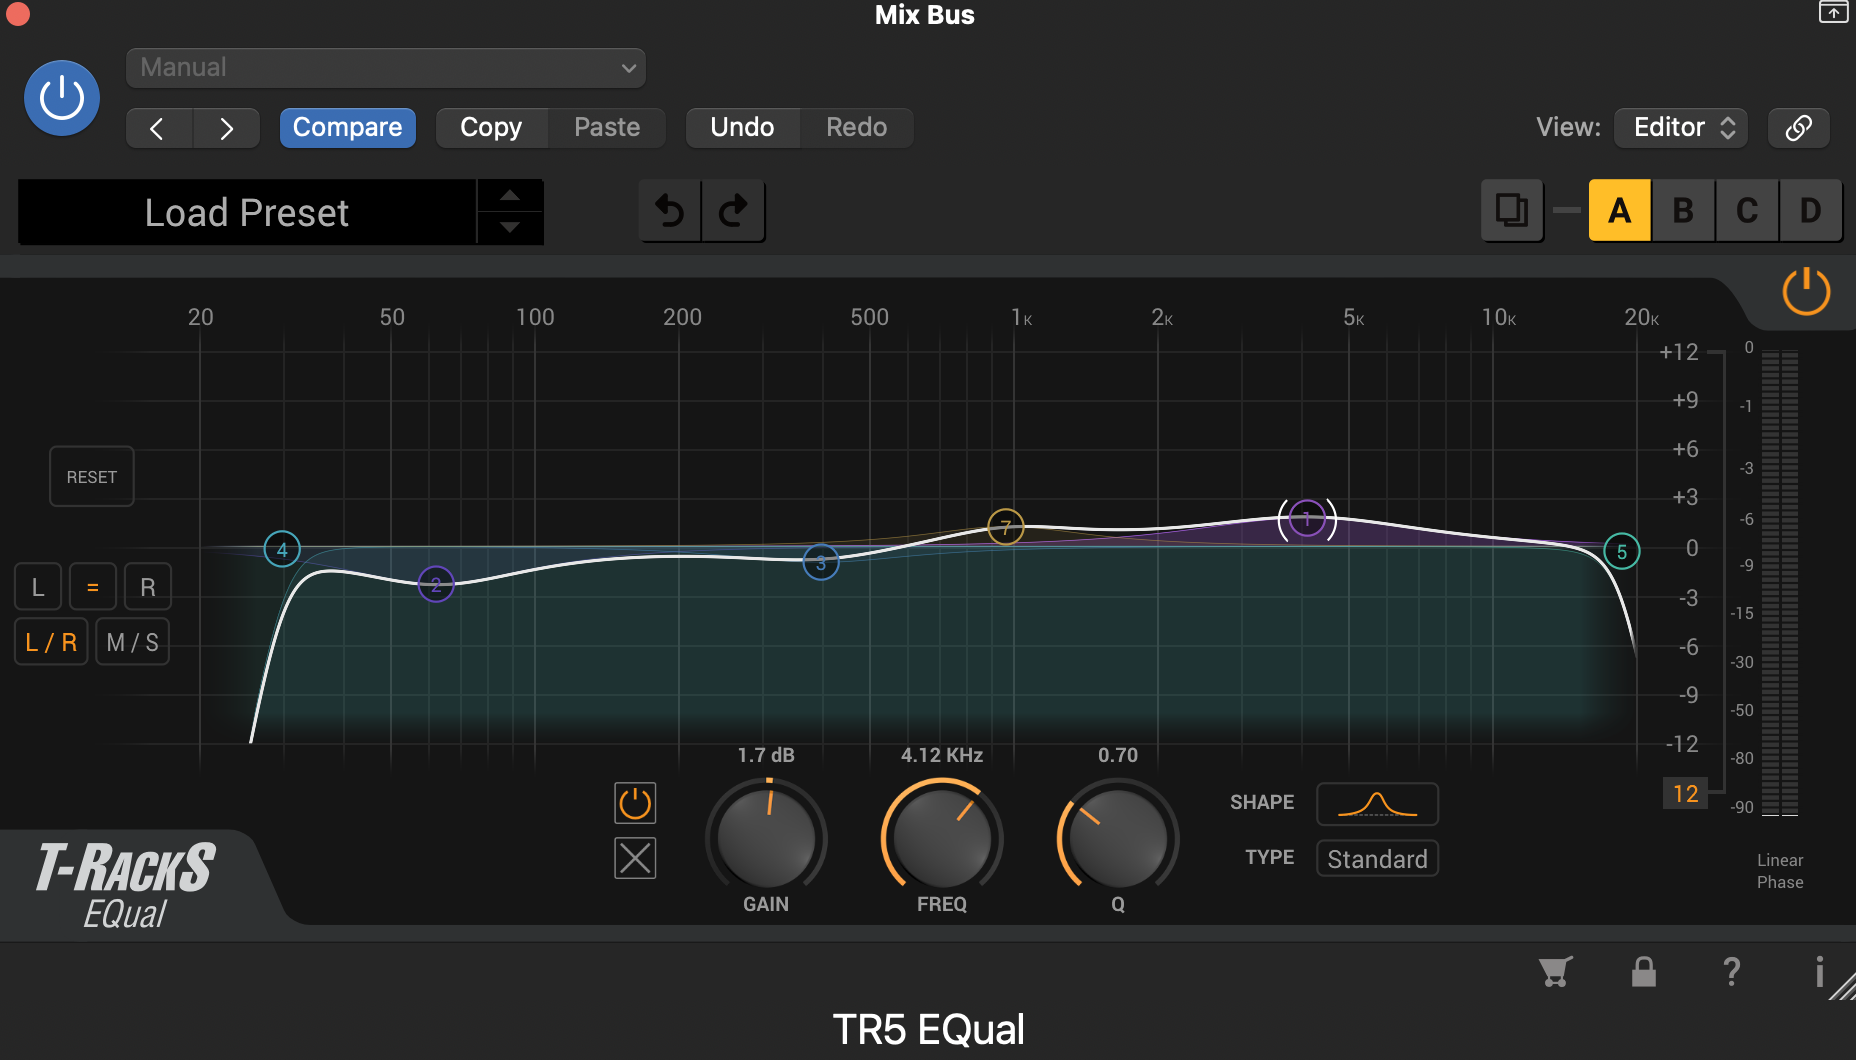
When used in solo, EQ can create a false sense of the sound of the instrument or vocal. This is because when a track is played in solo, it can sound different than when it is played in the context of the full mix.
Applying EQ to a solo track can make it sound better in isolation, but it may not fit well with the other tracks in the mix.
Additionally, EQ adjustments that sound good in solo may not translate well to other listening environments. For example, a mix that sounds great on headphones may sound harsh on speakers, and vice versa. EQing in solo can also lead to over-EQing, which can lead to a loss of clarity and definition in the mix.
So, it's usually better to make EQ adjustments while listening to the full mix, and not just the soloed tracks, that way you can make sure that the EQ adjustments are benefiting the full mix and not just the solo track.
4. Small Changes Add Up
When working on a mix, it's important to remember that multiple small EQ adjustments can add up over the course of the entire mix. Each element in a mix has its own frequency range and characteristics, and even a small adjustment to one element can have a big impact on the overall sound of the mix.
For example, if you boost the high frequencies on one element, it can make it stand out more in the mix, but it can also make the other elements in the same frequency range sound less prominent.
Similarly, if you cut the low frequencies on one element, it can create more space for the other elements in the mix, but it can also make the overall mix sound thin.
That's why it's important to make small EQ adjustments and listen carefully to the changes you are making. It's also important to make adjustments in context, by listening to the mix as a whole, and not just isolated elements.
By doing this, you can ensure that each element in the mix has its own space, but also complement and balance each other, resulting in a cohesive and polished mix.

Create Better Songs, Faster
Click below to download my free song-finishing checklist to help you create radio-ready songs without taking months to complete them.
5. Be More Subtle With Stock EQs
It is generally recommended to be more subtle when using stock EQ plugins, as they are designed to be more basic and versatile, and may not have the same level of precision or advanced features as a dedicated EQ plugin.
Stock EQ plugins are the ones included in most digital audio workstations (DAWs) and are intended to provide a basic equalization capability for all users.
6. Don't Obsess Over Plugin Order
Don't worry about obsessing over plugin order with EQ because the order of the plugins in the signal chain can have a relatively small impact on the overall sound of the mix.
The order of the plugins can affect the way the sound is processed, but the effect is usually subtle and can be compensated for by making small adjustments to the settings of the plugins.
You don't want to slow yourself down by fretting over where the EQ should go.
This is not the case when using "wet effects" like reverb and delay, in which case, plugin order makes a BIG difference.
That said, for more on whether you should EQ or use Compression first, check out my article here.
7. Create Clarity By Removing Muddiness

You can try to create clarity in your mix by boosting the higher frequencies, but more often than not you'll end up with a mix that sounds harsh and brittle.
You're better off cutting the muddiness first, and THEN applying some subtle boosting to the highs (if necessary).
You're going to find mud in the 100 to 500 Hz range, so start cutting there on individual tracks which not really need this range.
For my complete guide on removing mud from your mix, read my article here.
8. Mix In Mono
Mixing music in mono can be beneficial for a few reasons:
- Compatibility: Mixing in mono ensures that the mix will sound consistent on all playback systems, including mono systems such as AM radio or small speakers.
- Clarity: Mixing in mono can help to create a sense of clarity and definition in the mix. When elements are panned to the left and right, they can create phase cancellations, which can cause the mix to sound cloudy or undefined, but you can't hear these in stereo. Mixing in mono allows you to check and make sure you're not losing anything to phase cancellation.
- Balance: Mixing in mono can help you to balance the elements of the mix. When elements are panned to the left and right, they can create a false sense of space. Mixing in mono eliminates this problem and forces you to create a more balanced mix without the crutch of stereo panning.
It's important to note that you don't have to mix the whole song in mono, you can check the mix in mono from time to time to make sure it's consistent and balanced. And then, once you're happy with the mono mix, you can start to add stereo elements to enhance the overall sound.
9. Don't Rely On EQ Alone
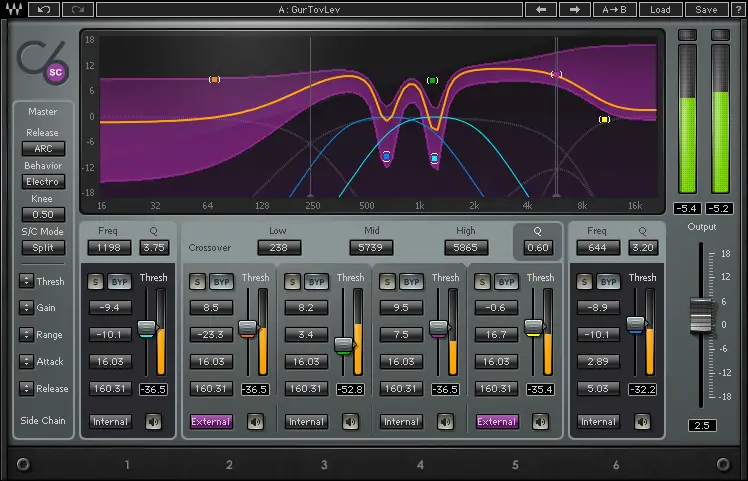
Don't just rely on EQ for shaping tone.
EQ's major flaw is that once you make a boost or cut, you're stuck with that (unless you want to get into extremely tedious automation).
Sometimes you're better off using a multi-band compressor, which will cut a frequency ONLY when it gets too loud, and passes whatever threshold you set.
So which do you use when?
EQ is great for making permanent changes. If you know for certain you are aren't going to need a certain frequency range in a particular sound, then cut it and move on.
However, if you like a certain frequency, but sometimes it pokes out of the mix too much, then a multi-band compressor is great, which can be used to ONLY turn down that certain frequency when it gets too loud.
For example, your vocals might be a bit too harsh, but when you cut the high frequencies, the vocal then becomes too dull.
Instead, you can use a multi-band compressor to only tame those harsh frequencies when they really do become too loud and poke out of the mix.
10. Use A Reference Mix
It's really hard to paint a picture without having a reference. Even the best artists typically have a reference photo they use if they are trying to paint a landscape or building.
Well, the EQ is the paintbrush of the mixing engineer. You don't want to start painting unless you first have a reference for how your sounds are supposed to sound.
By listening to songs that are similar in genre or instrumentation to your track, you can get an idea for how the bass, midrange, treble, and even individual instruments are supposed to sound.
Using this guide, you can make more informed and intelligent EQ moves.
11. EQ Your Effects
A lot of effect plugins have built-in EQs these days.
One of the best is Crystalline by Baby Audio.
However, if your particular delay or reverb doesn't have this, you can always add an EQ after the effect plugin on the same bus channel.
This can allow you to shape the sound of your effect so it doesn't muddy up or cloud your mix.
I demonstrate how to EQ your reverb in my video above.
12. Try Stacking EQs
Some EQs have characteristics that others don't. For example, EQs that are emulations of analog EQ hardware often introduce some subtle saturation as well as EQ.
I like to use digital EQs for precise cutting (as analogs typically aren't as precise) and then an analog EQ for subtle boosts, which can help by adding some pleasant coloration to the sound.
Finish More Radio-Worthy Songs, Faster!
EQ is just one piece of the puzzle when it comes to producing pro-quality songs.
If you want a proven step-by-step formula for mixing radio-worthy tracks from start-to-finish...
Create Pro-Mixes, Faster
Click below to download my free song-finishing checklist to help you create radio-ready songs without taking months to complete them.
This checklist will walk you through a proven step-by-step mixing and mastering process so that you don't ever have to guess or wonder what to do next.
You'll know exactly what to do, and when, so you can quickly mix, master, and finish more tracks.
I hope you found this post valuable!
If so, feel free to share, and let me know in the comments below…
