Are you working with some male vocals in your track but you aren't quite sure how to approach the EQing?
The best way to EQ male vocals is to roll off the low end, cut the bass around 120 Hz by 2-3 dB, add a small boost around 4.8 kHz, and a high shelf boost at 10 kHz. A DeEsser and perhaps even some multiband compression around 7 kHz can help to tame harshness and sibilance.
With that in mind, keep reading and I'll share some advanced EQ/vocal-shaping techniques in this post.

Create Better Songs, Faster
Click below to download my free song-finishing checklist to help you create radio-ready songs without taking months to complete them.
1. Use A DeEsser
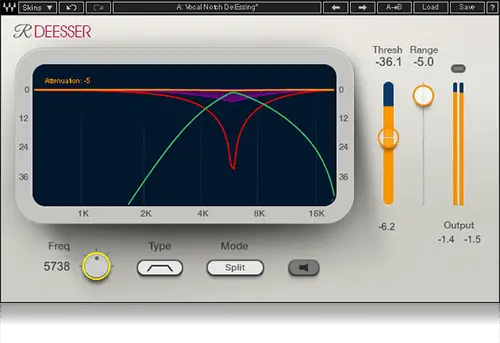
First, it's a good idea to "DeEss" the vocal performance. This involves placing a special type of compressor plugin on the track that responds to frequency, rather than volume. This plugin is called a DeEsser.
Simply insert the plugin on your vocal track and then dial in the settings.
- To do this, use the frequency control to sweep through the frequencies between 5 and 8 kHz.
- Once you find the problem area, bring down the threshold until ONLY the sibilance is triggering the plugin.
- From there, adjust the reduction to determine how much you want the de-esser to turn down the sibilance.
Be careful, though, as too much reduction can make your vocalist sound like they have a lisp.
For my complete guide to DeEssing, check out my article here.
2. Roll Off The Low End
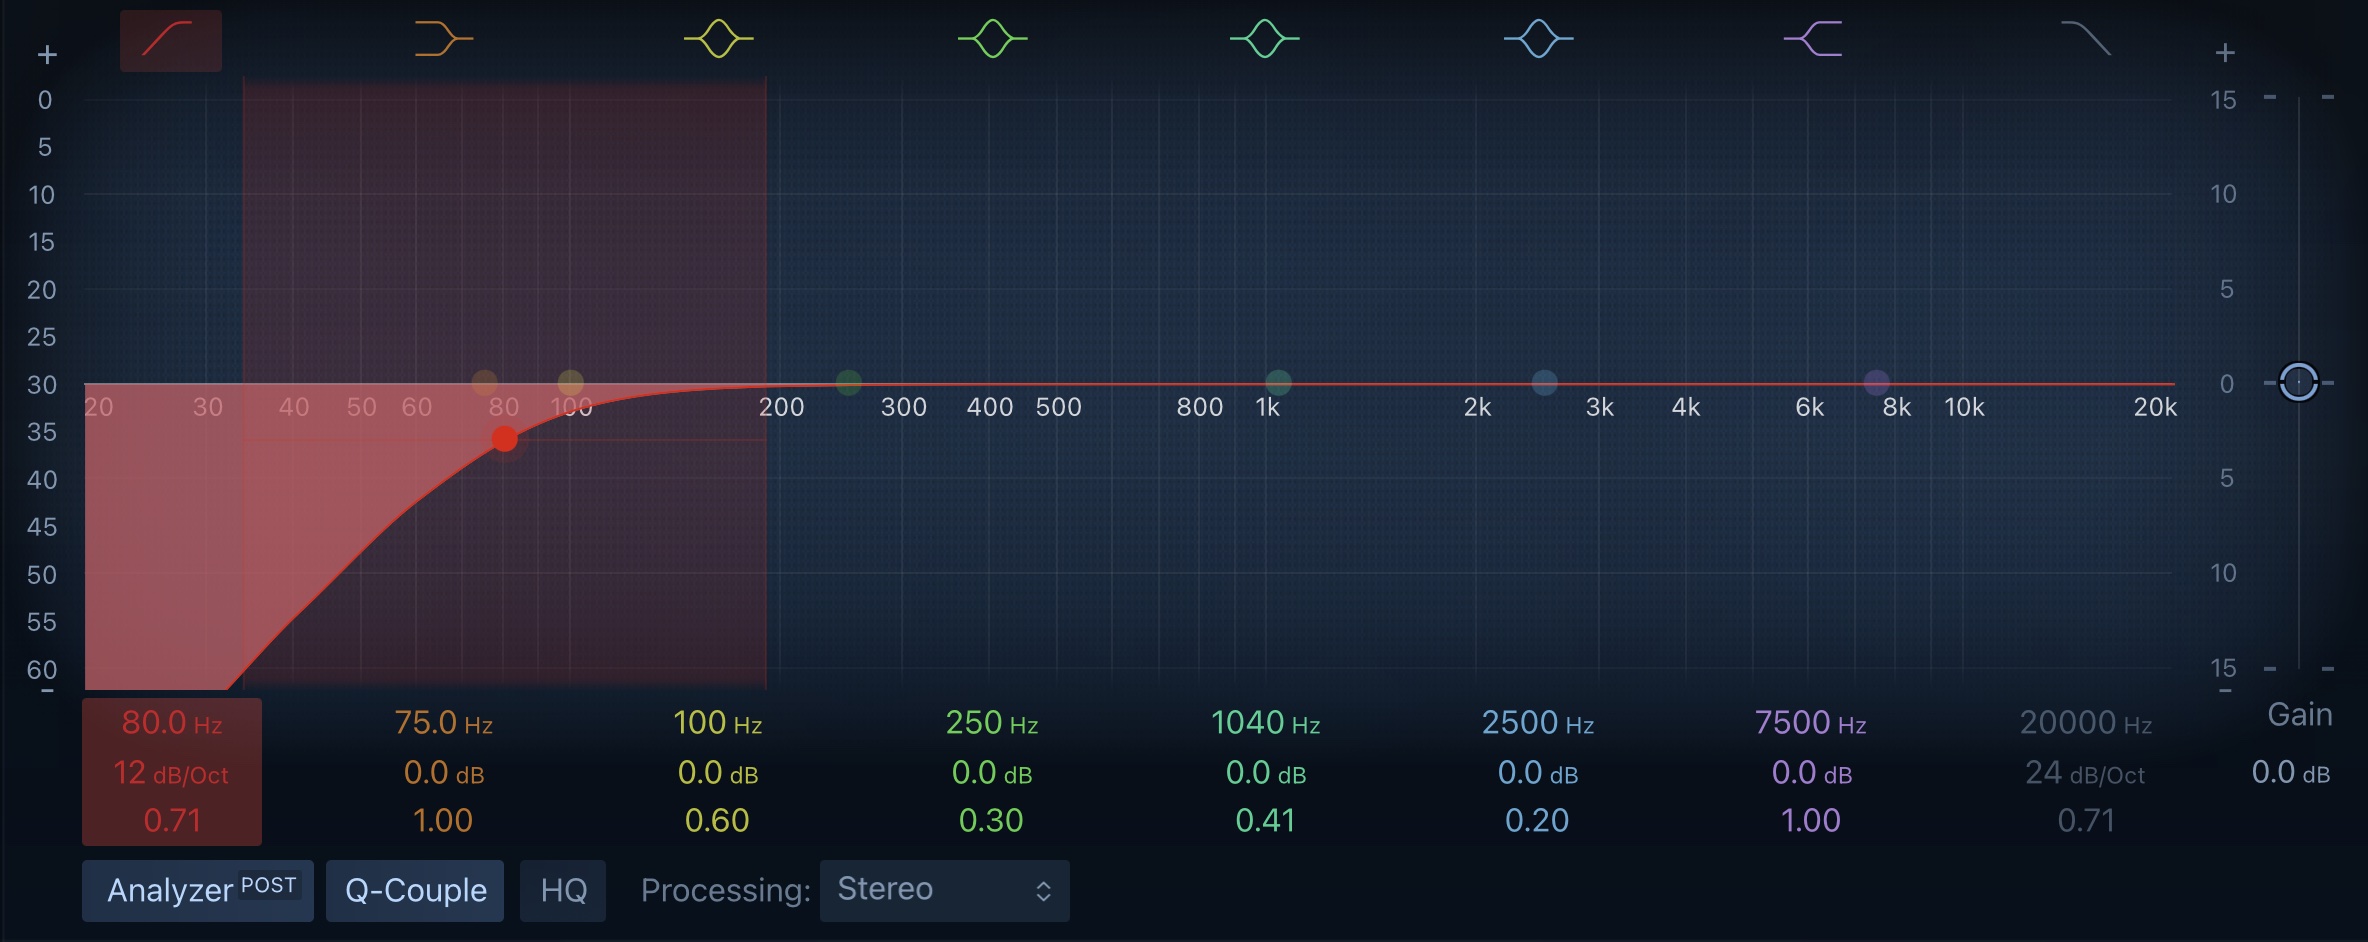
Next, roll off the low end with a high pass filter.
Move the filter up the spectrum until you notice it taking away from the vocal, then back up the curve until you can no longer tell a difference between before and after.
This might seem pointless at first, but this is actually an important step.
There is still sonic energy in this range, and perhaps even some unwanted noises like a microphone bump, plosives, or other background sounds.
Not only does rolling off this range ensure they won't be in your performance, but it can also result in a cleaner-sounding vocal and mix.
When compression and limiting is eventually applied to your mix, quieter sounds are increased, which means what you can't hear in that low range can suddenly become a problem, muddying up your vocals.
3. Reduce Mud & Boom
Speaking of mud, there still may be some bass frequencies that you're going to want to cut.
You can do this with a simple 2-3 dB cut around 120 Hz.
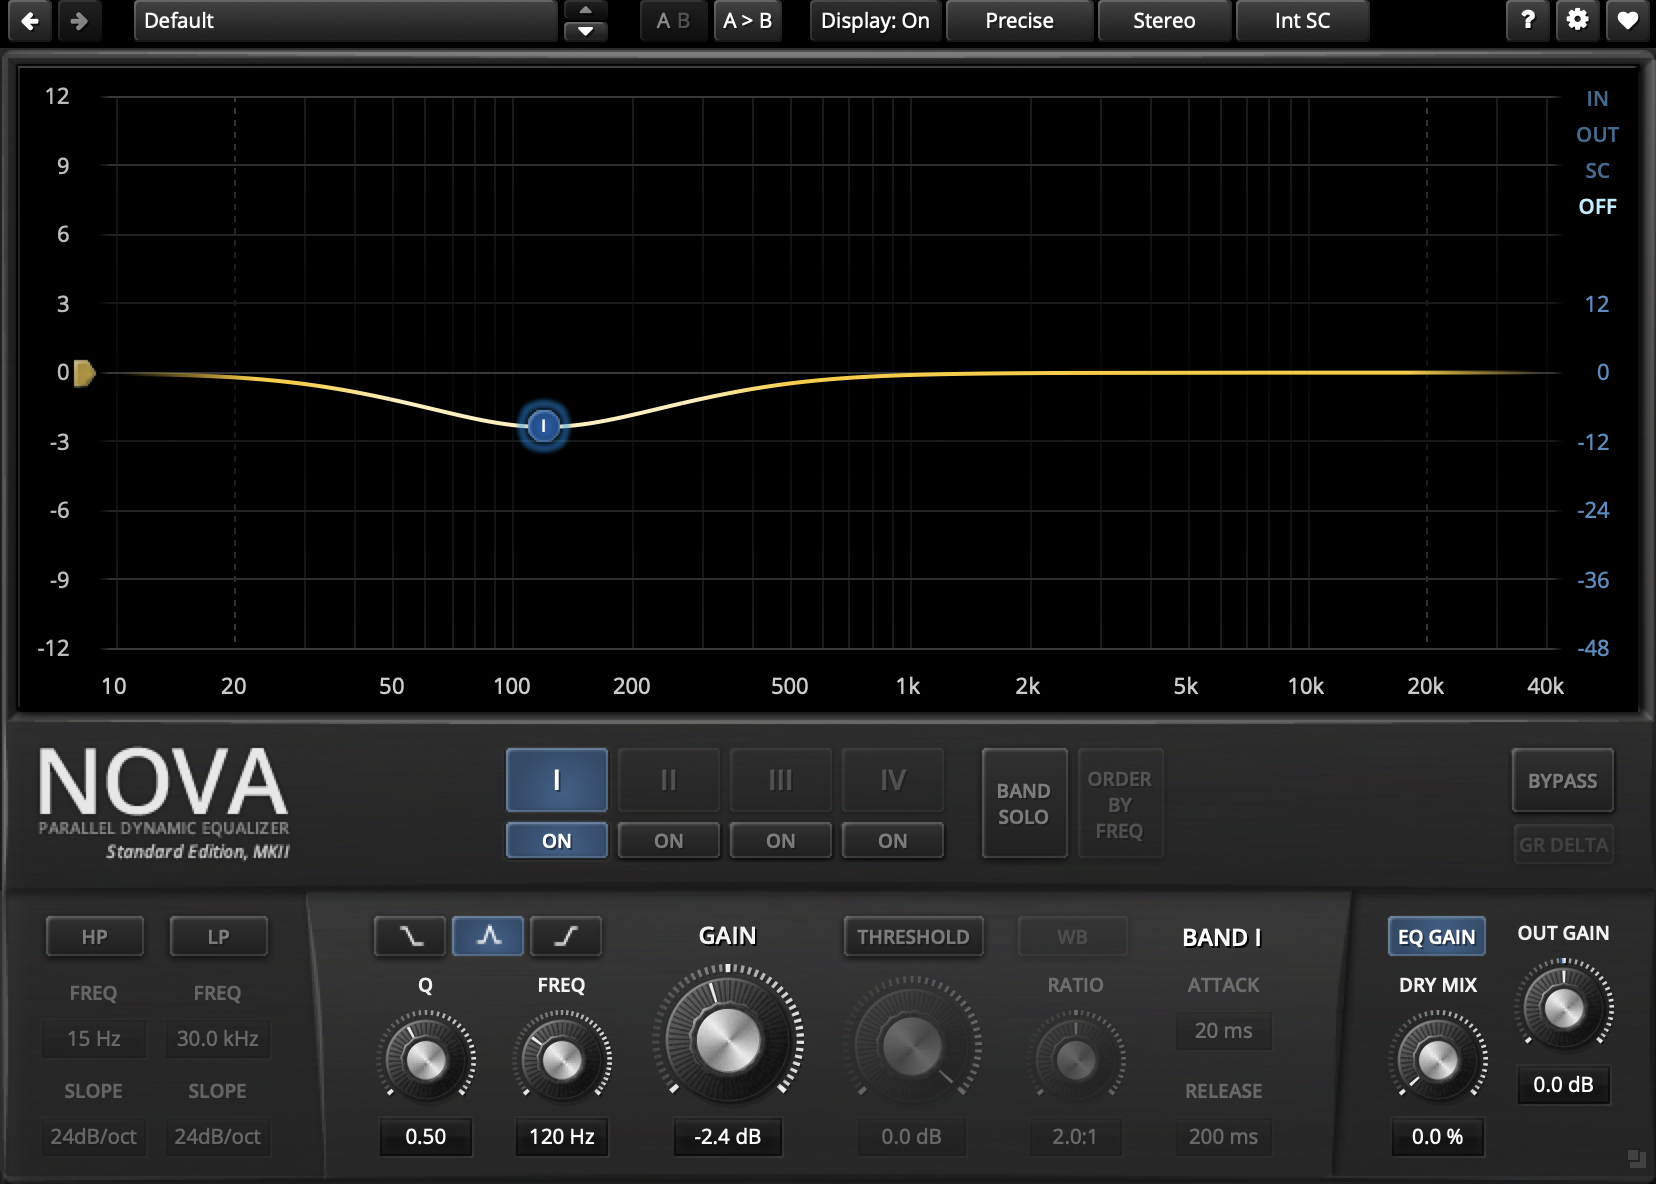
There could still be some mud in the low mids as well, so I like to use some multi-band compression for this.
I know, not technically EQ, but multi-band compression basically functions like EQ, only it's better in some ways.
I'm using a free plugin for this called TDR Nova.
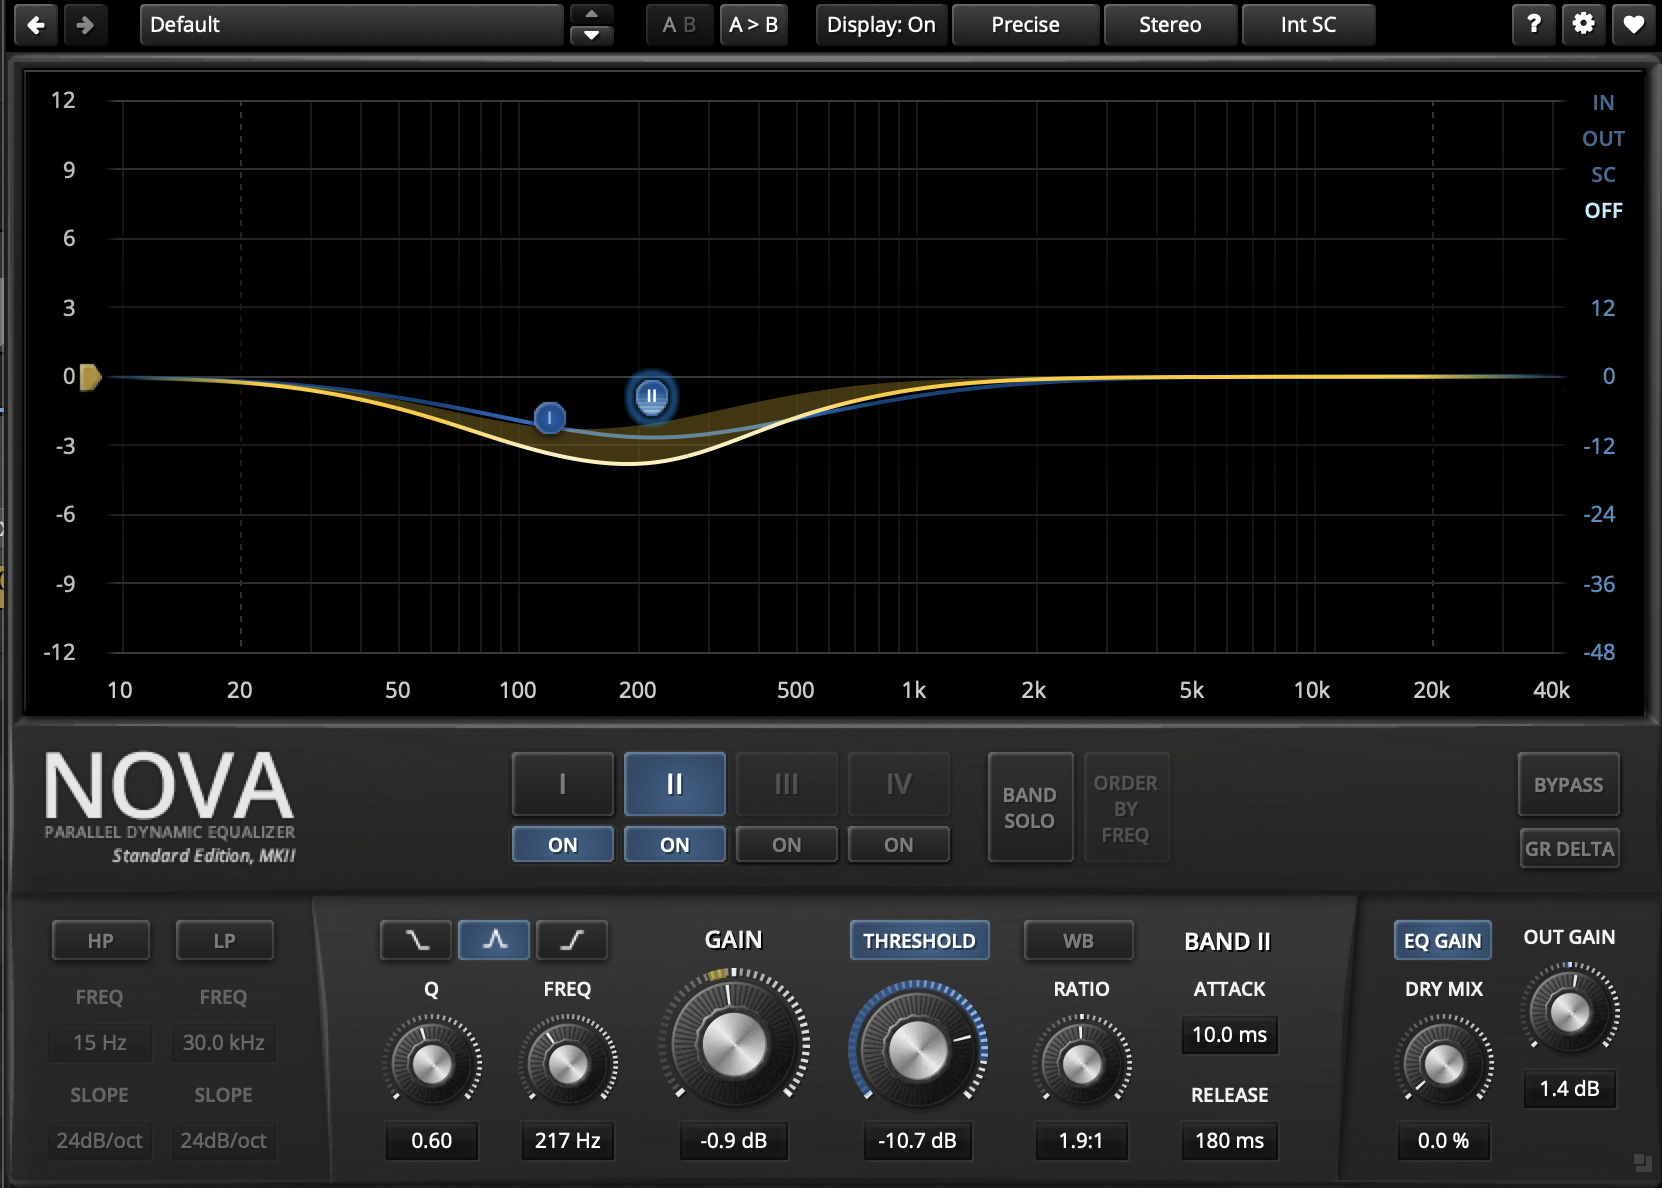
I don't really apply much of an EQ cut, but at 215, with a pretty wide bandwidth (Q point) I apply a tiny amount of compression
Just 2-3 dB of reduction with a ratio of 1.9:1.
What this does is it turns down the mud ONLY when the frequencies build up too much here. If the volume doesn't pass the threshold, then no cutting is being applied.
You might find that after making these steps, your vocal sounds a little bit too thin on its own.
However, in most pop music, with a lot of different sounds going on, you're typically going to want to shoot for a thinner vocal than you would think to keep the mix clean.
If you're making a more stripped down style of music, then you might want to dial back the low frequency cutting.
4. Reduce Harshness
You may find, even after a DeEsser, your vocal is still too harsh.
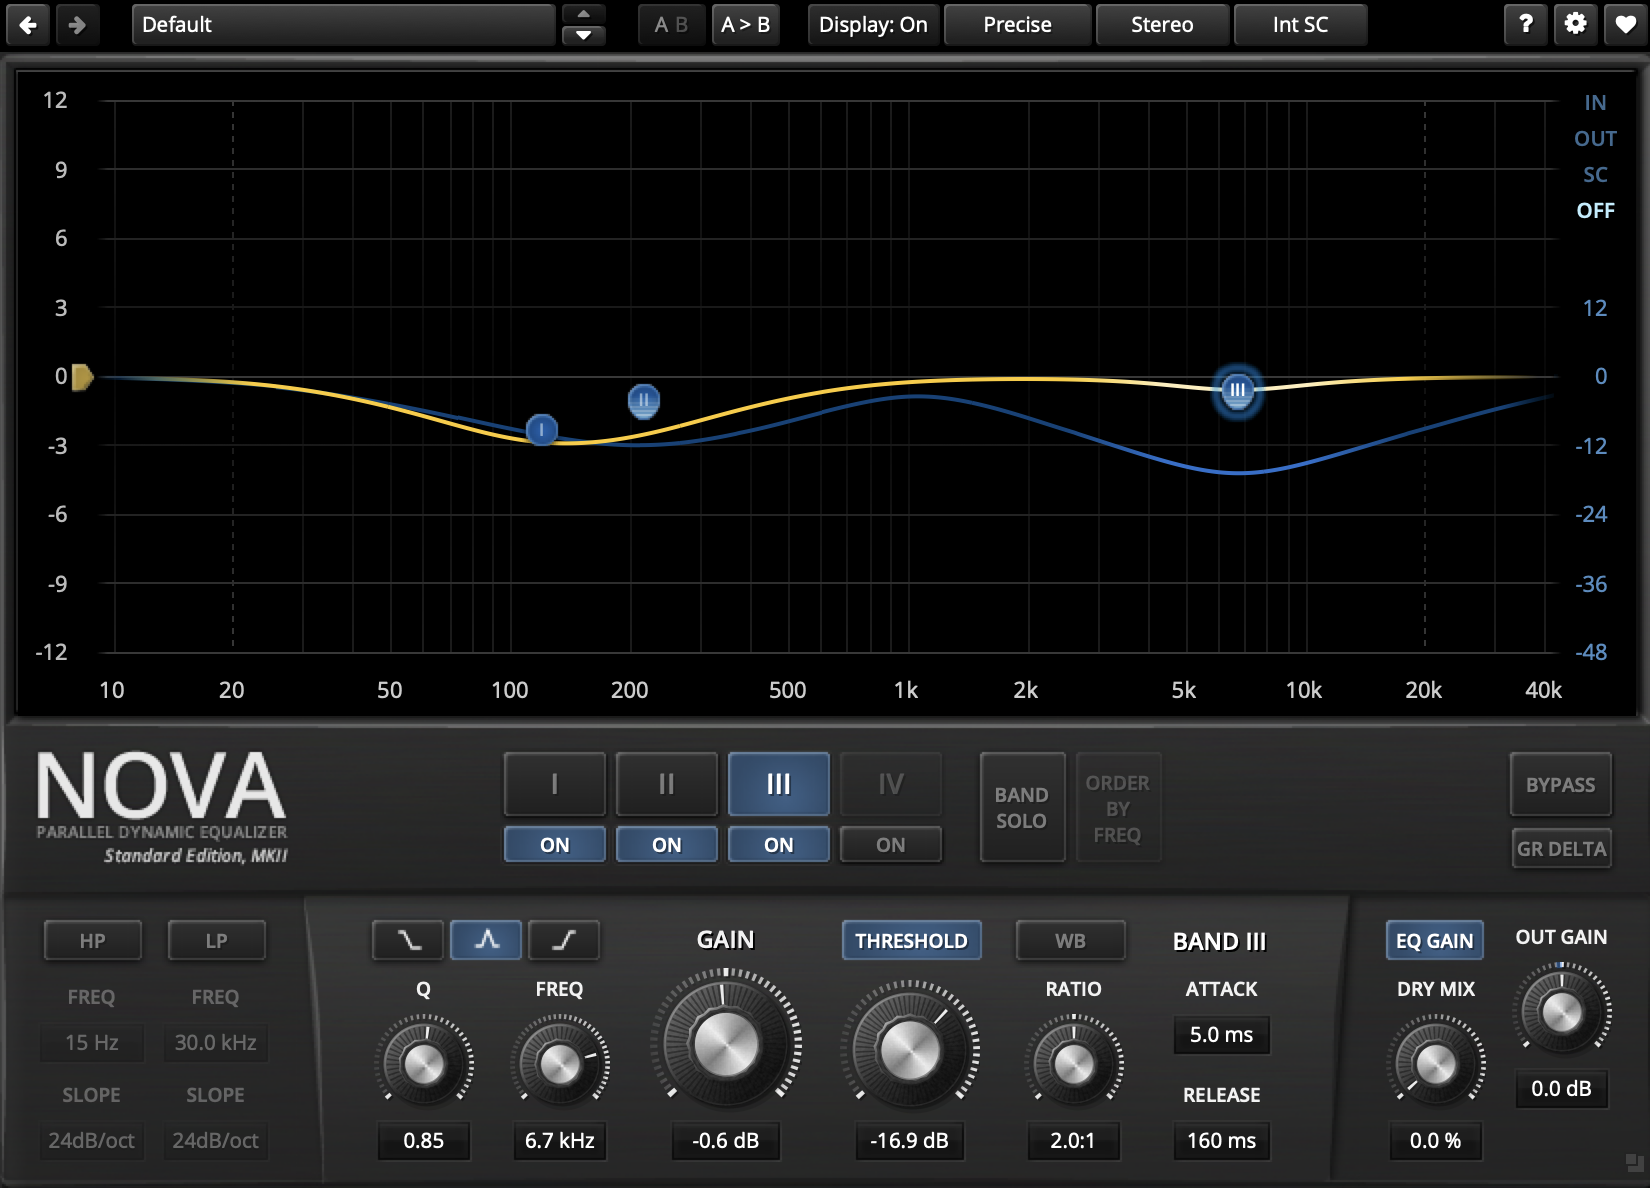
To fix this, you can again apply some multi-band compression around 7 kHz.
Set the threshold to taste so that you are only turning down the harshness. I like to keep the ratio still pretty tame at 2:1.
Depending on your vocal, you may or may not need this step.
5. Add Presence & Brilliance

To help your vocal cut through the mix, you may also need to add some subtle boosts to the higher frequencies.
I like to use an analog style EQ when boosting, like Waves VEQ3.
Here are some settings you can start with:
- Boost 4.8 kHz by 1-2 dB
- High shelf at 10 kHz by 2-3 dB
As always, don't use this as copy and paste settings. Every vocal performance is different, so use your ears.
6. Optional: Add An "Air Band"

There is an optional cool trick you can use if you really want to help your vocals shine through the mix, or if you just want some airier-sounding vocals.
You can add an "air band" do your vocals by boosting the frequencies above 20 kHz.
I know, it sounds crazy. After all, can't the human ear only hear up to 20 kHz?
Yes, that's right, but for some reason, when you boost this range, it adds some noticeable "air" to the performance.
My understanding is the Mäag Audio EQ4 pioneered this technique, but you can emulate this in Logic Pro X with the vintage graphic EQ plugin.
Just tune the plugin up +7, and then boost the 24 kHz range and increase the drive as desired.
And, boom! Instant air band added to your vocals.
Finish More Radio-Worthy Songs, Faster!
EQing vocals is just one piece of the puzzle when it comes to producing pro-quality songs.
If you want a proven step-by-step formula for mixing radio-worthy tracks from start-to-finish...
Create Pro-Mixes, Faster
Click below to download my free song-finishing checklist to help you create radio-ready songs without taking months to complete them.
This checklist will walk you through a proven step-by-step mixing and mastering process so that you don't ever have to guess or wonder what to do next.
You'll know exactly what to do, and when, so you can quickly mix, master, and finish more tracks.
I hope you found this post valuable!
If so, feel free to share, and let me know in the comments below…
