live_tv
Livestream Starting Soon
00
Hours
:
00
Minutes
:
00
Seconds
Up next in 10


++ DOWNLOAD THE CHECKLIST ++ https://www.orpheusaudioacademy.com/mixingchecklist/
✏️ SHOW NOTES ✏️
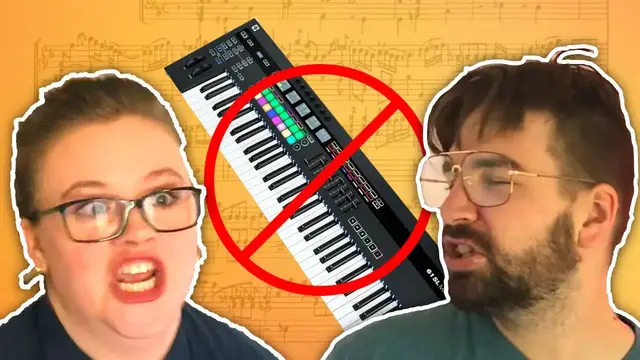
Don't know how to play an instrument and have very little knowledge of music theory but you want to create songs? No worries!
In this video I walk through how to write a song even if you don't know music theory or how to play an instrument.
TIME STAMPS:
0:00 - Intro
1:10 - Necessary Equipment
2:17 - Learn Your DAW
4:43 - Structure Your Song
6:30 - Create The Chords
11:59 - Create The Bass
13:07 - Create The Drums
14:43 - Add More Sounds
19:29 - Spice It Up
24:10 - Write The Lyrics
Show More Show Less View Video Transcript
0:00
How am I supposed to be able to write songs that don't know music theory or how to play an instrument
0:18
I don't have any skills! You're like such an idiot right now
0:22
Hey, you know you don't actually need to know how to play an instrument or music theory in order to write great songs
0:28
What are you talking about? Of course you need to know those things in order to write
0:33
songs! Why, it takes years of study and practice to- Nobody asked you perfectionism. Besides, some of the best producers don't know how to play
0:42
an instrument and only know very basic music theory. Here, come with me and I'll show you
0:47
how you can write a song even if you don't know an instrument or music theory
0:50
Hi, I'm Regan Ram with Orpheus Audio Academy, helping you make better music and build your
1:01
fan base online. So if you don't know music theory and you don't know how to play an instrument
1:06
how do you get started with making music? Well, there are five things you're going to need
1:11
starting out. Number one is software. You need a digital audio workstation. I use Logic Pro 10
1:18
but there's a lot of other great ones out there. Now number two, you're going to need headphones
1:22
because you are going to need to be able to actually hear what it is you're working on. So
1:26
obviously headphones are a key for creating music. And I'll include a link in the description below
1:32
for all the recommended software for beginners on how to get started making music. And you're also
1:37
going to need a microphone. This is if you are doing vocals. If you're not doing vocals or not
1:42
planning on actually recording any sounds yourself, then you can probably get away without a microphone. And then you're also going to need an audio interface
1:49
This is what your mic will plug into so that you can record audio
1:52
And then lastly, of course, you need a computer. Obviously that goes without saying. Computer, get a computer
1:57
All right, now that you have the necessary equipment to start making music, how do you
2:01
go about creating a song if you don't know theory and you don't know an instrument
2:05
Well, for the rest of this video, I'm going to walk through nine steps for creating a song
2:10
And these steps don't require knowing an instrument and only very basic knowledge of music theory
2:15
which I'll also cover in this video. So step number one is to learn your DAW
2:21
learn your digital audio workstation. You need a basic understanding of how your tool works
2:25
so you can go about creating music. And I'll go ahead and give you a basic overview
2:29
of that right now. All right, so all DAWs are gonna have the same basic layout
2:33
You got this big window right here. This is your timeline or your project window. This is where you will be putting in your tracks
2:38
Then you go over here in this menu here, you have where your actual instruments will go
2:42
And then here on the left is where you can add effects to your instrument and things like that
2:47
And at the top here, you got your, some important navigation here. You got some information about the tempo
2:51
where you're at in the song. You have your stop, play, record, loop menu here
2:57
And then on the left here are basically ways you can add in extra menu items in here on Logic
3:02
So you got this little box here, which is your instrument library. This is where you can choose different instruments
3:06
Here's your information tab. This again, this is where you can get more information on each track and what effects it has
3:11
And there's just all this little dropdown as well, which gives you more features, which you can close if you want
3:15
This little dial here will show you smart controls. This will pop up to kind of give you an easy way
3:20
of editing effects that are on your instruments. This is the mixer tab here
3:24
So this is basically your virtual mixing desk where you can control volume, panning
3:29
different effects, sends, insert effects, EQ, and all that kind of stuff
3:33
All right, so now we have an instrument here. If you want to add an instrument, we can just click the plus button here, and we can add a software instrument
3:38
or we can add audio or a drummer track. It's also got an option here for external MIDI
3:42
or guitar or bass, but you can just ignore these. You're not really going to need those very frequently
3:46
So I'll go ahead and create an instrument here. And then we can choose the sound by going over here on the left
3:50
These are all your sound banks are. And so we could go to synthesizer if we wanted to
3:55
choose the classics and pull up some kind of synth sound. And now we have a synth
4:00
And then I don't have a keyboard right now I'm using. So you can actually use your keyboard, your computer keyboard to play instruments
4:05
We're going to window, show musical typing. I use this a lot
4:08
Now you got a little basically octave and a half here. keyboard that you can play. So with this we can just use the keys on our computer
4:17
keyboard to actually put in the sound we want to record. And if you want to record
4:21
all we have to do is make sure our track is armed so you can see the little red R here. If I click on this song, click the R, or if I click on this track and I click R
4:28
now we know that that track is going to record. And so we can just hit the
4:32
record button then right here. And there we've recorded something. And that is a
4:40
basic overview on how to use Logic. All right, now that you actually know how to use your tool, now it's time to actually
4:47
start creating a song. You're also going to need to know the structure of your song
4:51
So where will your verses go? Where will your choruses go? Bridge, intro, outro, all that kind of stuff
4:58
So you want to create the structure of your song. And you can do this as you go
5:02
But for the sake of this video, I'm actually going to create the structure first. All right, so now we're going to go ahead and create the structure of our song
5:08
We can do that by clicking this little drop down here and this gives us access to some
5:14
different features here, arrangement, markers, signature, tempo. We're just going to pay attention to the markers here
5:19
So we're also going to use this selector tool here to kind of help measure our sections
5:26
I'm going to have this just measure a section of eight bars because there's something called
5:30
the eight bar rule, which basically states that you want to change up something about
5:34
your song every eight bars so that people don't get bored. I'm gonna start here at 5 too instead of right here at the front in case I want to add the intro
5:41
Or some other lead in to this and I have space for that Sorry, now that we have our kind of our section
5:46
We'll go ahead and put in each of the areas of our song So let's click the little plus here, which lets us put in a marker
5:51
And we're gonna make this our verse 1 And then we'll have it lead into a pre-chorus, which will not be as long
5:58
Now we'll have it be the same way I'll lead into a pre-chorus And of course you can structure your song however you want to
6:02
This is just how I'm doing this one And then we'll have the chorus Now I'll just color code these to make them easier to see. I'll just hit option C to bring up my colors
6:10
I'll make my verses blue. So we can close that up and now we have the structure for our song
6:18
All right now that we have the structure in place it's time to start building our song
6:23
And again there's a lot of different ways you can go about starting a song. But for the sake of this video we are going to get started with the foundation or the groove and build our way up
6:34
So now we're going to create the chords. What do you do? How do you create chords if you don't know music theory
6:38
Oh, you must know music theory in order to write chords! You have to memorize the firsts, the fourths, the seconds, the thirds, the fifths, the inversions
6:47
I thought we were writing a song. What's with all the math
6:52
Of course you need to know math in order to write music, you cotton-inny-headed muggers
6:56
Pop quiz! What is the square root of 369 delta? Uh, three
7:02
Three? Why on earth would it be three? What would you do in that situation? Gosh
7:08
No, you actually don't need to know any of that to create chords. No, wait. It's not kind of important
7:14
Look, don't worry about it. You don't need to know music theory to create chords
7:18
After all, music theory just describes music that's already been written. Here, I'll show you
7:23
You can use a tool called Autochords.com and this will give you different chord suggestions based on the key you choose
7:30
So then we just have to pick a key song. So we can see a basic cliche chord progression here is D
7:36
A, B minor, G. Obviously if you don't want to use cliche, you can kind of find some different
7:41
examples of chords you like here. But I'm just going to stick with what's simple, what's tried
7:46
and true for this song, and I'm going to stick with this chord progression here. So we've got D
7:50
A, B minor. Now you might be thinking, hey, I don't know the notes in D or A or any of these chords
7:54
Well, if you just hover over, it shows you all the notes in that chord. So you know this chord
7:58
is D, F sharp, and A. So if we go in here and we go on our instrument and we add the effect pitch correction this can then show you all the notes in a particular scale So we going to use the major scale and we going to use D So now this shows us all the notes in that scale
8:15
If you want to go really easy, you could just use the key of C because that's all the white keys and no black keys, but we're using D here
8:21
So we can see all the notes now in that scale. And we're going to go ahead and create now our chord
8:28
So we'll just right-click and do create MIDI region. I'm not going to worry about the sound yet
8:31
I'm just going to drag this over for the whole, for half the verse section, because the verse section basically repeats twice, which is a very short verse section. So I'm probably actually going
8:39
to have it like kind of continue into the pre-chorus, or maybe I'll even shorten the pre-chorus. Now
8:44
that I think about it, this is a big common thing of songwriting. It's you change things on the fly
8:50
So I'm going to change this pre-chorus. Now we got our instrument here, and we're going to put in
8:55
our chords, double click on here. That brings up the piano roll, and we know that it's our chords
8:59
were D. So we're just going to write in those root chords first to make it simple. All triad
9:04
chords, which is what we're doing, all basic chords, they have the root note and then they have what's called the fifth, which is the fifth note in the scale. So this is D. So if D is one
9:14
E would be two, F sharp, three, G, four, A would be five. So you would move up to five. Another
9:20
easier way to do it is just to count up seven total notes. If you don't know all the notes in
9:24
the scale, which I don't. So we'll just click on these, hold down option, and then move up seven
9:28
notes. One, two, three, four, five, six, seven. As you can see, we arrived at A. Either way, we did it
9:35
Now we have our chords. But this isn't a complete triad chord, so we're going to add in the middle
9:40
note, or what's called the third. And the trick for this is if it's a major chord, you just count
9:44
up four notes. If it's a minor chord, you count three. So this was D major, so we'll count four
9:49
One, two, three, four. Same thing with A. Three, four. Now this was B minor, so we're only going to count up three
9:56
and then G was major. Now I sound like this. So let's go ahead and choose our instrument now
10:03
actually because I don't really want to use this electric keyboard. Yeah I kind of like that. So we're going to go with that but we're going to try and make these
10:11
chords now a little more interesting. But before we do that we're just going to make life easier
10:15
for us when we do the bass because the bass is just going to copy this root note for our chords
10:20
So we're going to go ahead and copy this down the whole octave
10:23
and now we're just going to see how we can make these chords a little bit more interesting. So a
10:28
way to do that is to make these chords suspended chords and so what that means is basically you
10:33
just take this middle note and you move it up or down in the scale. So we'll just try that and see
10:38
how it sounds. So yeah. Yeah that sounds a lot more kind of dreamy and it fits more with the
10:45
I'm creating a synthwave track, so I'm just going to bump this on here and see how that sounds
10:57
Wow, I like that a lot. And this pitch corrector tool is actually adding this kind of VHS warble kind of sound effect
11:03
which really fits with my retro feel that I'm going for with this song
11:08
And another thing you can do, which really fits with my genre, you might not want to do this
11:14
is inverted chords. That's just taking a note and dropping it up or down an octave
11:19
And we'll see how that sounds. And that's pretty good. So we'll just copy that now for the rest of the verse
11:26
And we'll use the same chords for the pre-chorus as the chorus. We'll just change them up a little bit so it's not the same progression
11:33
So we got a little bit more interesting sounding. So we can just go to auto chords and find a new progression that we like
11:39
Maybe we'll like this one. And maybe we'll do that. So A, E, F sharp, minor, D. All right
11:43
So now we got our chords. All right, and the great thing is we can now just copy the and paste these. Maybe I'll just do two chords
11:55
All right, I like that so now I got all of our chords done I caught you a delicious bass
12:00
All right, so now it's time to do the bass. So we'll just duplicate this synth to make things simple
12:05
and we're gonna switch it out for a free synthesizer I like to use for the bass of these kinds of songs called obxd
12:14
I'm going to pull up the factory preset of round bass one, and I'm just going to bring
12:24
down the resonance on this and drop the filter amount too, just to make it a little darker
12:29
And then I'm literally just going to copy all this. And I'm going to pull this up, and then I'm just going to delete all the top here
12:35
And then I'm going to get the brush tool to make this really quick. I'm going to keep everything an eighth note and draw in my bass like that
12:44
so now our verse sounds like this and we'll do the same thing with the rest of this
13:04
alright and so now we have all of our bass sections done so now it's time to add drums and Logic makes this really easy
13:11
really easy you can just hit this plus button for a new track add in drummer at create and it's
13:19
basically like hiring a drummer for you and you have this awesome drumming pattern already created
13:29
and you can change the different types how loud and complex it is you can whether you're using
13:35
hi-hats or toms or cymbals, Logic makes it so easy to really add some really cool drum sounds
13:42
But I'm not going to use Logic's drum kit, actually. I'm going to delete this track
13:47
I'm going to use another plugin I really like to use for synthwave music, and it's called BM Vice
13:53
And so I'll pull that up and this has a really cool synthwave type drum sound
13:57
So I'm just going to find a pattern in here I like and I'll drag that into the project. so here are my drums now and i can just keep dragging them in from the synth wave
14:08
plug-in that i have or it's you can just simply create a midi pattern double click on that and
14:15
now you can see all your drum sounds right here you got your kick snare hi-hat toms
14:21
and your cymbal pretty simple and you got some other cool sounds here so this is really nice
14:28
So you could just program this in yourself, but to save time, I'm just going to drag in different parts here
14:32
All right, so now we got our chords our bass and our drums
14:41
So we've got most of the song done already All right, so step six is basically filling out your song by adding in some other rhythm or background sounds
14:51
You know, this could be maybe an arpeggiator This could also be writing in some instrument parts to take over the melody of your song when the vocals aren't carrying that
15:02
So in order to create these parts, you might want to study what is it that some of your favorite artists do
15:07
or what are some of your favorite songs, and where do they put their leads
15:11
or what other kinds of sounds do they have going on in the background or in the periphery or as part of the rhythm of the song
15:18
and use those ideas to get some inspiration for what you can do for your song
15:21
So in synthwave, there are a lot of arpeggiated sounds. That means notes that just follow all the notes in the scale up and down
15:29
And so that's what I'm going to do for this song. Now this is a good time to clean things up a little bit
15:35
We'll just label this drums and bass and we'll do some coloring
15:39
So I can just hit option C to pull up the color panel. All right
15:43
So now it's time to just kind of add some interest to the song, add some other instruments, add some lead sounds to this track to basically just finish the
15:52
instrumentation. So a lot of synthwave songs have arpeggiators so I'm gonna do that. I'm gonna add
15:58
in an arp sound. So I kind of like this sound. And then I'm just gonna change up basically the top
16:07
and the middle notes is what I like to do All right so I ended up settling on this progression I just kind of move the notes around until I found something I like So that pretty much do it then for the choruses So now I just got to find something similar to do for the verses
16:25
I came up with this pattern here and then I'm just going to kind of move things around a little bit to make it a little bit more interesting
16:30
I'm actually going to have this play the, be basically the intro as well
16:34
I have a bass extend out to and I'll that will be basically intro of the song
16:48
and let's move it into the other verse section all right now let's see if we can add some lead
16:56
sounds for our song so I'm gonna duplicate this again put it on top I like to have my higher sounds
17:04
on top and let's find a good lead instrument now here in the synthesizer section
17:22
all right i created that lead and we're gonna probably change the sound but right now let's
17:26
just focus on making this a little bit more interesting so obviously if you could play an instrument you could make this sound a lot more interesting i can't play an instrument i'm just
17:33
just hitting some keys here on my computer keyboard. And so I do something really basic
17:38
and then I kind of just move things around later to make them sound more interesting. So this is obviously not in time
17:43
so I'm gonna have to correct that as well. I'll play the second half a little bit better
17:48
So let's see if we can kind of get these in time
17:55
All right, that sounds kind of interesting. So I might go with that. And things are getting a little bit loud
17:59
so I'm just gonna select all these and just pull down the volume a little bit. You can see we're clipping right here
18:03
All right, so I'm going to make this a little bit more interesting. But first, I feel like this sound kind of needs a delay to fill out the space a little bit more
18:13
So normally, I'd recommend you put a delay on a send. But we're keeping things simple right here
18:18
So I'm just going to throw on a delay. This is a delay called Comeback Kid by Baby Audio
18:24
It's really nice for retro-sounding delays. All right, and I'm going to just also throw on some more reverb as well
18:31
Alright, so we're gonna layer this in over the chorus. I'm kind of hearing something throughout here from this
18:37
All right, so I've got my little lead part here now and it sounds like this
18:54
And all I did was just again just plug in notes that I thought sounded good that I knew were in the scale so that's what
19:01
all you do you really just mess around here's what you got to work with here are your notes you put them in see what sounds good to you and move on from
19:07
there so now that we have that we can move this to our other chorus sections
19:13
and I'm also gonna just extend the end of the song here because I'm gonna plan
19:18
on having this fade out and that's pretty much it now we got our song and you can be done here or you know you can always add in more little instrument
19:26
instrumentation and parts to make it a little bit more interesting. Alright now
19:30
we're on to step seven which is adding what I call spice to your song. So right
19:36
now you got all your parts, you got kind of all your key instruments for your song
19:40
but it can be sounding a little stale, a little bland and so that's where spice
19:44
comes in. We can do some things to kind of spice up the song and make it sound a
19:49
little bit more interesting. Now there's a lot of different things you can do to
19:52
make really interesting transitions and just really spice up your song but we don't really
19:58
have the time to go into all of them in this video so be sure to subscribe because I'll be
20:02
definitely doing videos in the future talking more about transitions and cool things you can do to
20:07
make your songs just sound more interesting but for now we're going to do just a couple of things
20:11
to help this song out we're going to do some filter automation and we might you know take
20:17
some things away and add some things in as well. So transitions, you know, transitions are going
20:23
to come between each of your sections. So here it's kind of between the verse and the chorus
20:36
So that's a little, a little awkward. You can't really tell that there's kind of a transition
20:40
there. And so I think I'll do that by helping that out by just kind of, I'll take away the
20:44
bass during this section and we'll see what that sounds like. Just that alone kind of helps you hear the distinction that you're kind of
20:56
building into something bigger and I also might make the drums a little bit
21:00
more simple during this portion. I think I might just take out..
21:05
Also not sure that I like this pre-chorus stuff here so I'll just take that out for now
21:09
So like we said we're gonna filter the this the synth. So first we'll focus on
21:13
filtering envelope here. So we might start down a little bit lower actually
21:22
The way we do this in Logic is we hit the A button or A key on our keyboard and that
21:27
shows us the automation and we want to go into the RetroSynth here. That's what we're seeing
21:31
right here, the RetroSynth effects. It's in the filter section. You can see where it says filter
21:35
over here on the synthesizer. So here's the filter and we want to go to Cut Off by Envelope
21:43
And so now that's in here. So if we just kind of, we can even click in here now
21:49
to add anchor. So you can see it's at .82, and you can see over here .82
21:53
So we know we're editing the correct thing. And so we're gonna put some points over here
21:58
And we don't wanna affect the rest of the song. So we're only gonna put some other anchors here
22:04
So then we're gonna pull this down a little bit. And we're gonna let that kind of pull upwards
22:11
Let's see what that sounds like. you'll see it will automatically now turn the envelope up over time
22:24
All right, so that's nice, but it's a little too quiet. So we want to automate to this
22:31
I believe this is the resonance right here. Let's go to that resonance
22:50
Maybe we'll have the resonance come up a bit in the chorus too to again just kind of add
22:54
some more of that interest
23:06
So we will select these. on them hold option so we can copy and we're just going to pull this over
23:24
So that is our chords now. So let's automate our plucks here a little bit
23:38
And these are just going to do a simple cutoff automation here
23:42
actually while we're at it we're gonna do the same thing with the bass
23:55
all right so we got all our automation now all right now we're on to step eight which is creating
24:13
lyrics a basic rule of thumb for creating lyrics is you want to tell a story that what going the most captivating for the listener because everyone loves stories So you can use your verses to kind of progress the story and tell where the story is going over time And you can
24:31
use your choruses to basically drive home the message or the resolution of that story. And then
24:38
you might have a bridge section or other one-off sections in your song that might give another side
24:45
to the story or just kind of be a wild card. And that's a general principle for writing lyrics
24:50
Now, I actually find it helpful to kind of come up with the melody, the notes of the melody first
24:55
before writing the lyrics so that I can just then fit the lyrics to the melody rather than trying to
25:00
fit the melody to the lyrics. Yeah, because the melody is what's most important, what it sounds
25:06
like, the notes. So I'm going to try and just listen to the song and hum something out and see
25:11
what I get. All right so I got my concept. I'm actually writing in a sci-fi novel with my wife
25:18
and in that story the main character is playing a basically an online game with his friends and
25:27
in that game his avatar is called Star Cow and he's like this big leader in the game so I'm just
25:32
gonna make a goofy song about Star Cow and this person who wants to join his amazing village city
25:40
colony thing. Another very handy tool for writing lyrics is rhymezone.com. Wow, these are bad lyrics
25:52
Everyone in school's gonna think I'm a freaking idiot because of you. Alright, so once you get your lyrics done, it's now time to record the vocals. And you might be
26:00
thinking, oh no, I'm not a singer. I'm not good at singing. What do I do? Well, you actually don't
26:06
really need to be a great singer either to be able to put vocals to your song. So number one
26:14
you might think you're not a great singer, but you're probably better than you think. Otherwise
26:18
if you really just don't think your voice is that good, there's some other techniques we can do. We
26:23
can use auto-tune, we can tune things to make them sound cool, we can use other different vocal
26:27
effects, or you can just find someone else who can sing for you who is good at singing
26:31
Now I'm going to record myself singing the lyrics that I just wrote
26:37
This should be messy since I'm not a very good singer, but I'll show you some techniques
26:41
after I've recorded them to kind of make them sound good or at least in tune
26:44
I've already got this audio track here. Alright, so that's pretty much it then for recording the vocals
26:57
Now I just gotta clean these up and mix them. Now before we go, I just want to show you how you can tune vocals so even if you are
27:05
not great at singing yourself, you can get your vocals at least on tune
27:12
So we can double click this and then we can click this little double helix looking shape
27:18
here called flex. Turn on flex. And then we're going to go to flex pitch and now we can see, oops, and now we can see all
27:35
the notes that are being sung here. And so, the key to doing this is first just highlight all these and just drag this pitch
27:43
correction tool a little bit over. And you don't want exactly 100, but pretty close so you can get an idea of where the
27:51
notes are supposed to be. And then we'll of course pull out our handy pitch
28:00
correction tool and you could just use this as is so if you want to hear what
28:05
that sounds like. Guide me to your epic colony. So it kind of gets that auto-tune
28:17
effect. This is basically auto-tune which isn't the best. I know it used to really be in style
28:22
it's not so much in style anymore. So it's better just to turn this off and then we'll just manually
28:27
tune things here. So we'll loop this. So you can see here I'm such a horrible singer, it's singing
28:38
on G sharp. That is not in the key. So we'll see if it's supposed to be a G
28:47
I hate me too Yeah, that sounds better. And this is going a little high here
28:54
You can see the line here is like where the middle of where I'm singing is
28:58
We can just pull down this vibrato a little bit to flatten it out so it stays more in the middle where it's supposed to be in the middle of the note
29:06
And this is, I'm singing two here. So this is really supposed to be like one note
29:12
So yeah, and this is C sharp, which I guess is, yeah, it's in the key
29:16
So let's do that. and this sounds like it's supposed to be one note so we'll just highlight all these and we'll just
29:22
go ahead and get that straightened out here and then this is F there's no F so this should be
29:28
probably F sharp the fun thing is when you're tuning you can really change stuff around and
29:33
kind of get a different melody if you want so like what if I went you know up to B what does that sound
29:39
Guide me to... Not so good. But obviously you can go really crazy
29:47
Guide me to... You're a... So anyway, we'll put that back where it was
30:04
So that's it. Now it is in tune. It's a little sloppy, but that's kind of a quick way
30:09
to go about and doing it, you normally wanna spend more time working on that. And then it also sounds a little dark
30:14
because of the pop filter I'm using. It kind of encompasses my whole mic
30:18
so it's gonna be a little dark. So I'm gonna pull up the high end here at the EQ
30:23
just boost these high frequencies. And it's a little dark down here
30:32
so give this a little bit of a cut and we'll cut out the low end completely
30:36
because we don't need that. We're getting a little bit into mixing here, which isn't really what this episode is about
30:42
But we want it to sound at least decent. And then we're gonna wanna throw on some compression too
30:55
This will help balance out the performance. And that's basic vocal work right there
31:09
Alright, so now you have written a song! Congratulations! Your first songs probably aren't going to be very good
31:16
They're probably actually going to be pretty bad, but that's okay because it takes a while
31:22
to get good and you have to start somewhere. So embrace the bad
31:26
Embrace writing bad music. yourself write a lot of bad songs. Just keep writing, keep writing, and keep learning and
31:33
you'll get better over time. If you want more tips on how to write songs, be sure to grab
31:38
my free hit creation checklist in the description below. This breaks down the nine key elements
31:44
that all hit songs tend to have in common. So if you're at a loss for how to create your
31:48
song or how to structure your song, then be sure to grab this guide in the description below
31:54
Thanks for watching and be sure to drop a yes in the comments below if you're going to embrace this mindset
31:59
and you are going to go and make a song, even if you can't play an instrument
32:03
even if you don't know music theory. Be sure to drop a like if you found this video helpful
32:07
and I'll see you in a future video. Bye. This is pretty much the worst song ever made
#Music & Audio
#Experimental & Industrial Music
#Music Education & Instruction
#Music Equipment & Technology
#Music Reference
#Vocals & Show Tunes