Parallel compression is a great production technique that can add greater detail and excitement to a track.
Parallel Compression, also known as New York style compression, is an audio dynamic range compression technique where one blends an unprocessed "dry" signal with a heavily compressed version of the same signal. The resulting effect is a loud and full sound that is common in modern professional mixes.
To learn more about how to set-up parallel compression, and how to use it practically, keep reading...

Create Better Songs, Faster
Click below to download my free song-finishing checklist to help you create radio-ready songs without taking months to complete them.
If you're unfamiliar with compression, and how to use it...
Then see my complete guide to what compression is, and how to use it in your productions, here.
What is the purpose of parallel compression?
Parallel compression allows you to raise the volume of low-level signals and draw out their details without compromising the signal's transient peaks. The result is an increase in the average level of the signal without compression artifacts.
This is because parallel compression is a form of upward compression, where dynamic range is reduced by bringing up the quietest parts of a track (rather than downward compression which works by squashing peaks).
Parallel compression can be used on anything, although it is most commonly used on drum busses, bass guitar, and vocals.
Parallel compression is a great technique to use for any sound that you'd like to be more "in-your-face".
Is Parallel Compression Good? Why Is It So Popular?
Parallel compression is a fantastic mixing technique as it allows you to easily control the dynamics of an instrument without it sounding compressed (due to the peaks not being squashed on the dry version of the track).
So if you're looking to make an instrument punch through the mix, while also sounding natural and not squashed by compression, then parallel compression is your answer.
How Do You Set Up Parallel Compression?
First, you need to decide which track you want to compress with parallel compression.
Shortcuts for setting up Parallel Compression
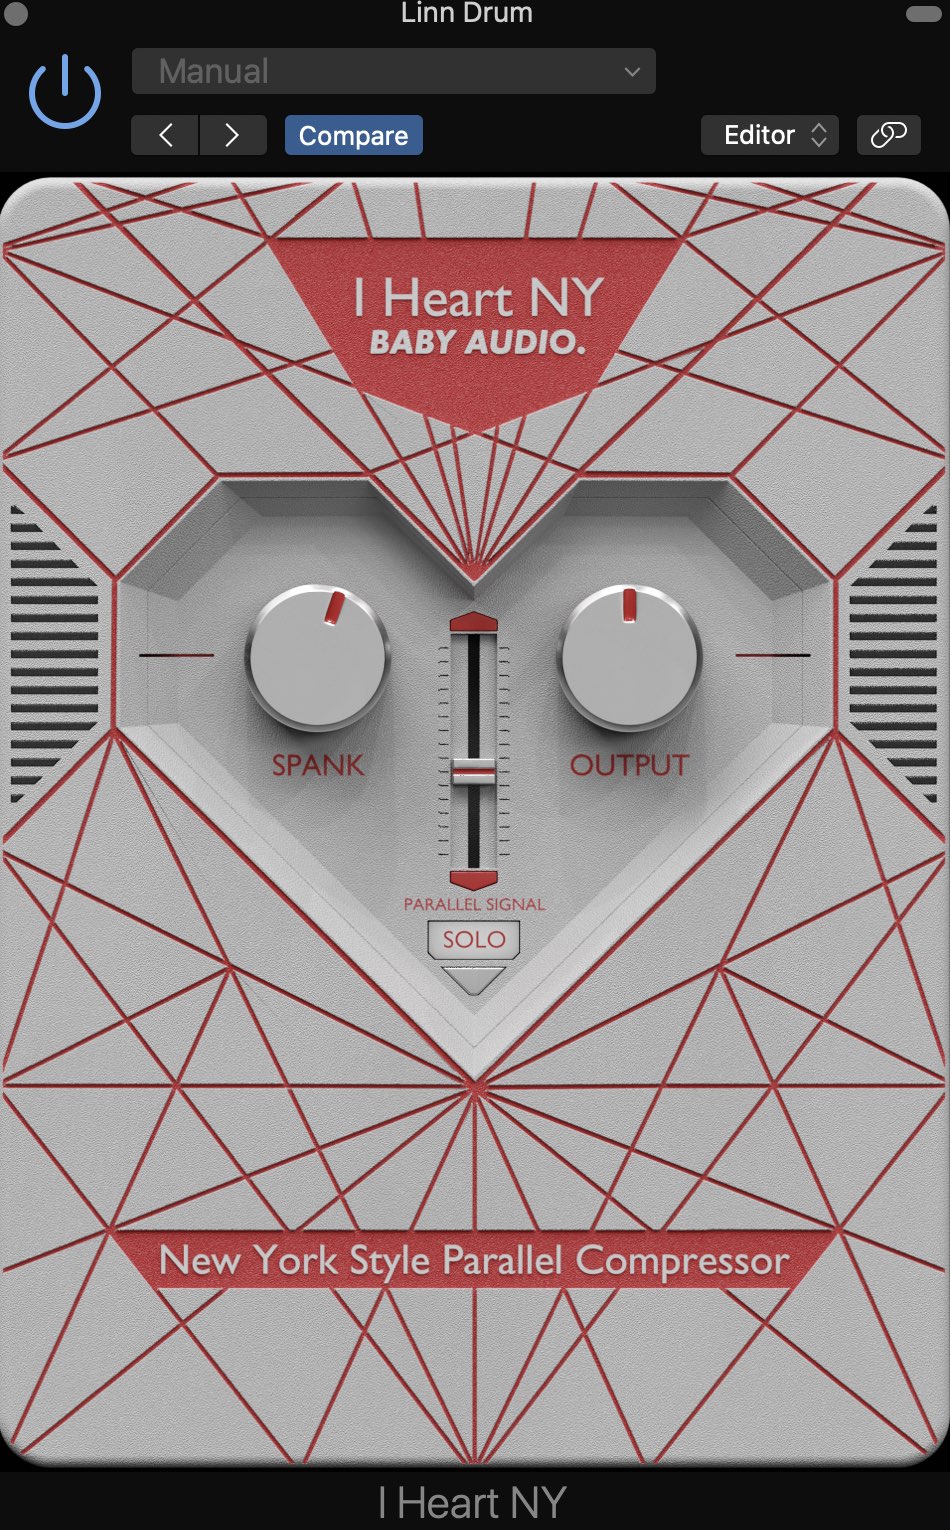
The easiest way to use parallel compression is to just throw the I Heart NY plugin by Baby Audio on your track and dial in the simple controls to taste.
This is designed as a plugin that applies parallel compression for you without you haven't to do any routing in your DAW, which is great if you're looking to save time.
You can watch my video below for how to use this plugin....
And you can get it for 10% off when you use my code "OAA" at checkout here.
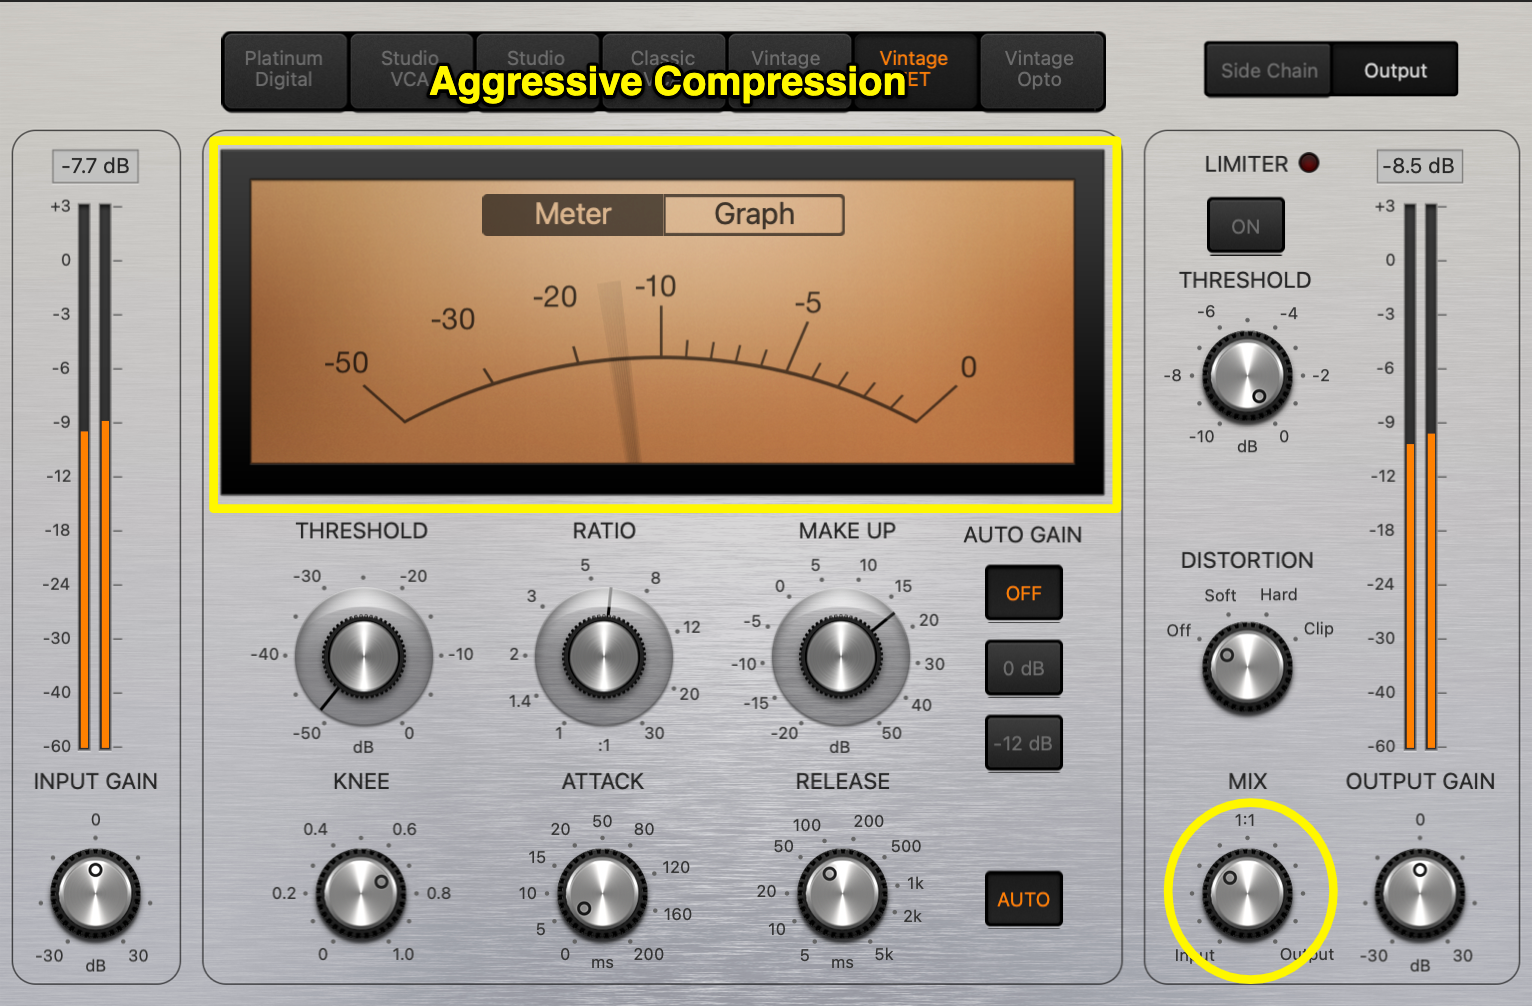
Alternatively, you could also just throw a compressor plugin on the track you want to compress that has a mix control.
By setting aggressive compression settings on your compressor, and then adjusting the mix knob, you are able to blend in your aggressive compression with your dry signal, thus, creating the parallel compression effect.
Shortcuts aside, here is the traditional way to set up parallel compression...
The Traditional Way To set up Parallel Compression
First, decide which track you want to apply parallel compression, and then send it to a bus (also called an "aux channel).
A bus or aux track is like an audio track, with all of the same controls, but you can't record to them.
Instead, you send a copy of audio from another channel to them in order to receive effects.
If you are confused on the difference between buses, auxs, inserts, sends, and returns, just check out my video below:
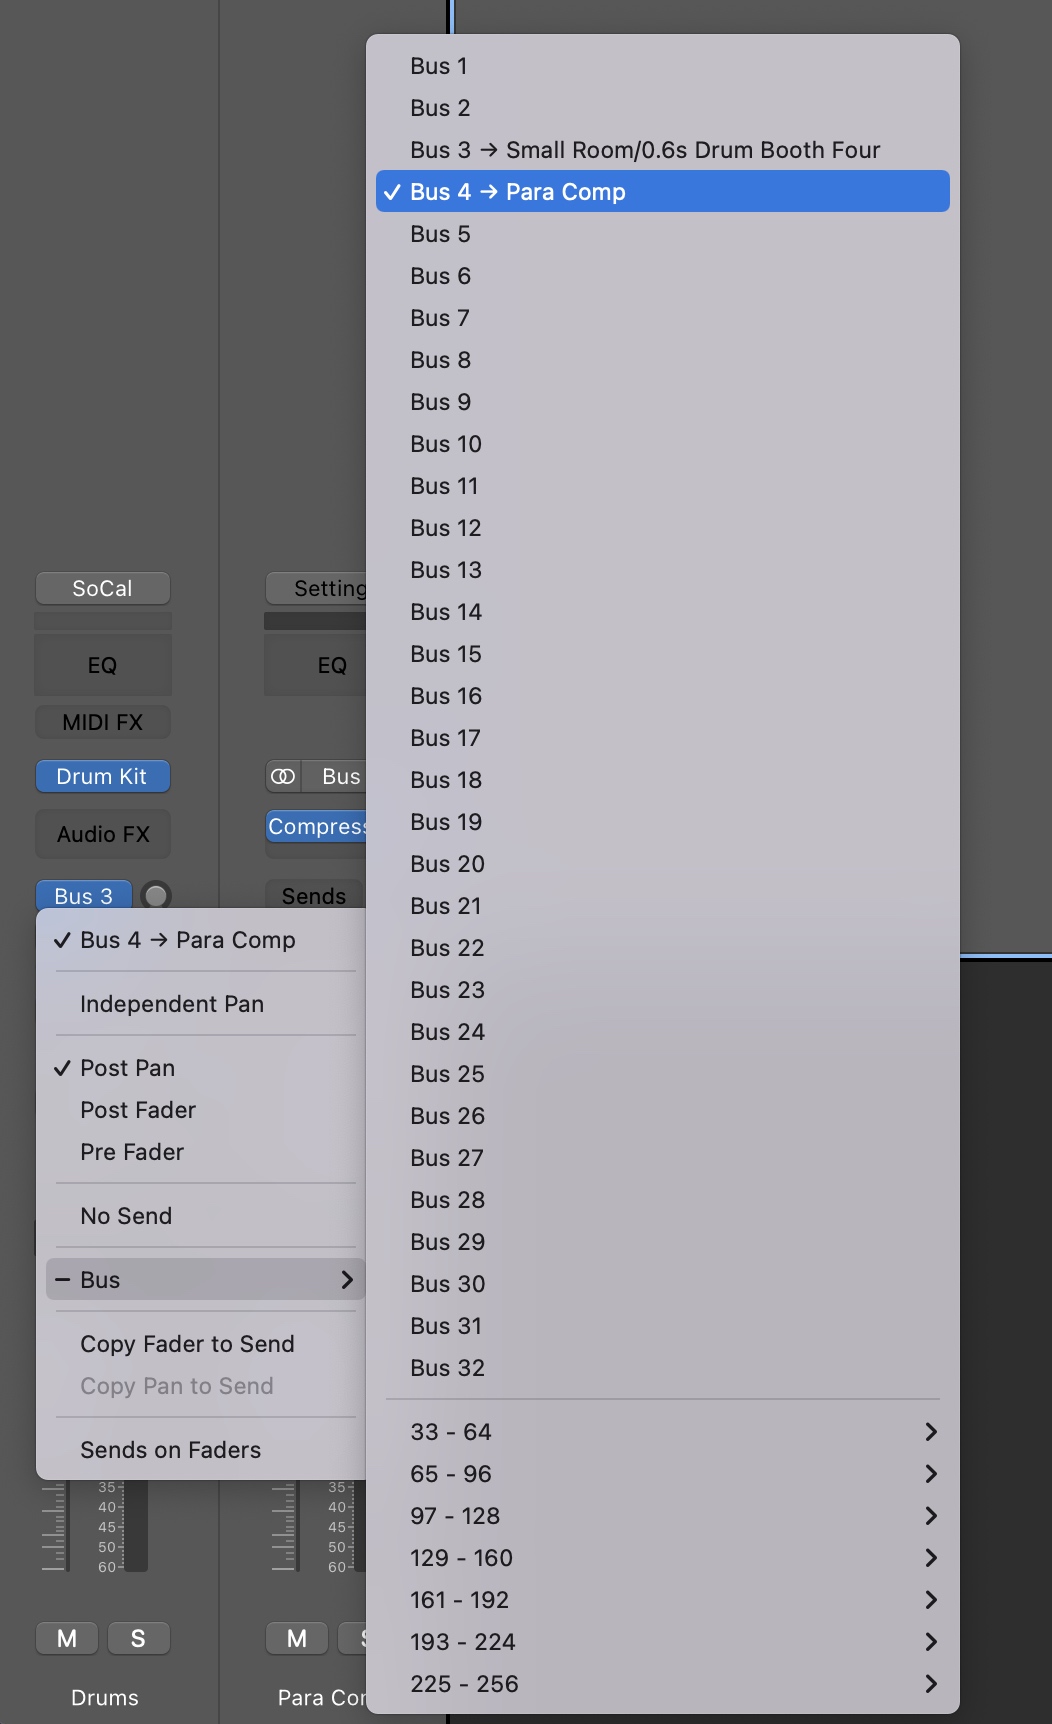

On the bus, simply place a compressor and crank up the ratio and threshold settings so that you are applying a very heavy amount of compression.
From there, simply dial in the blend with the send knob until you have a happy medium between dry and compressed signal.
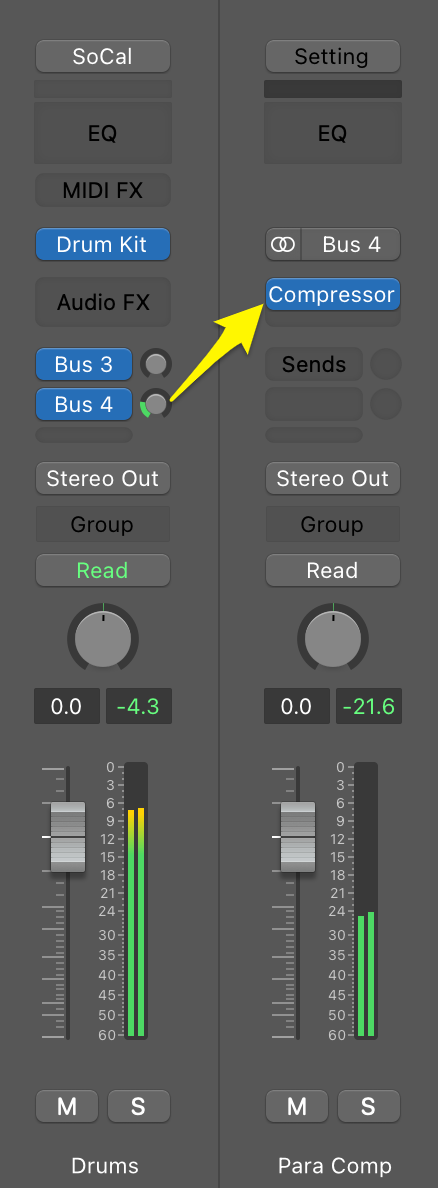
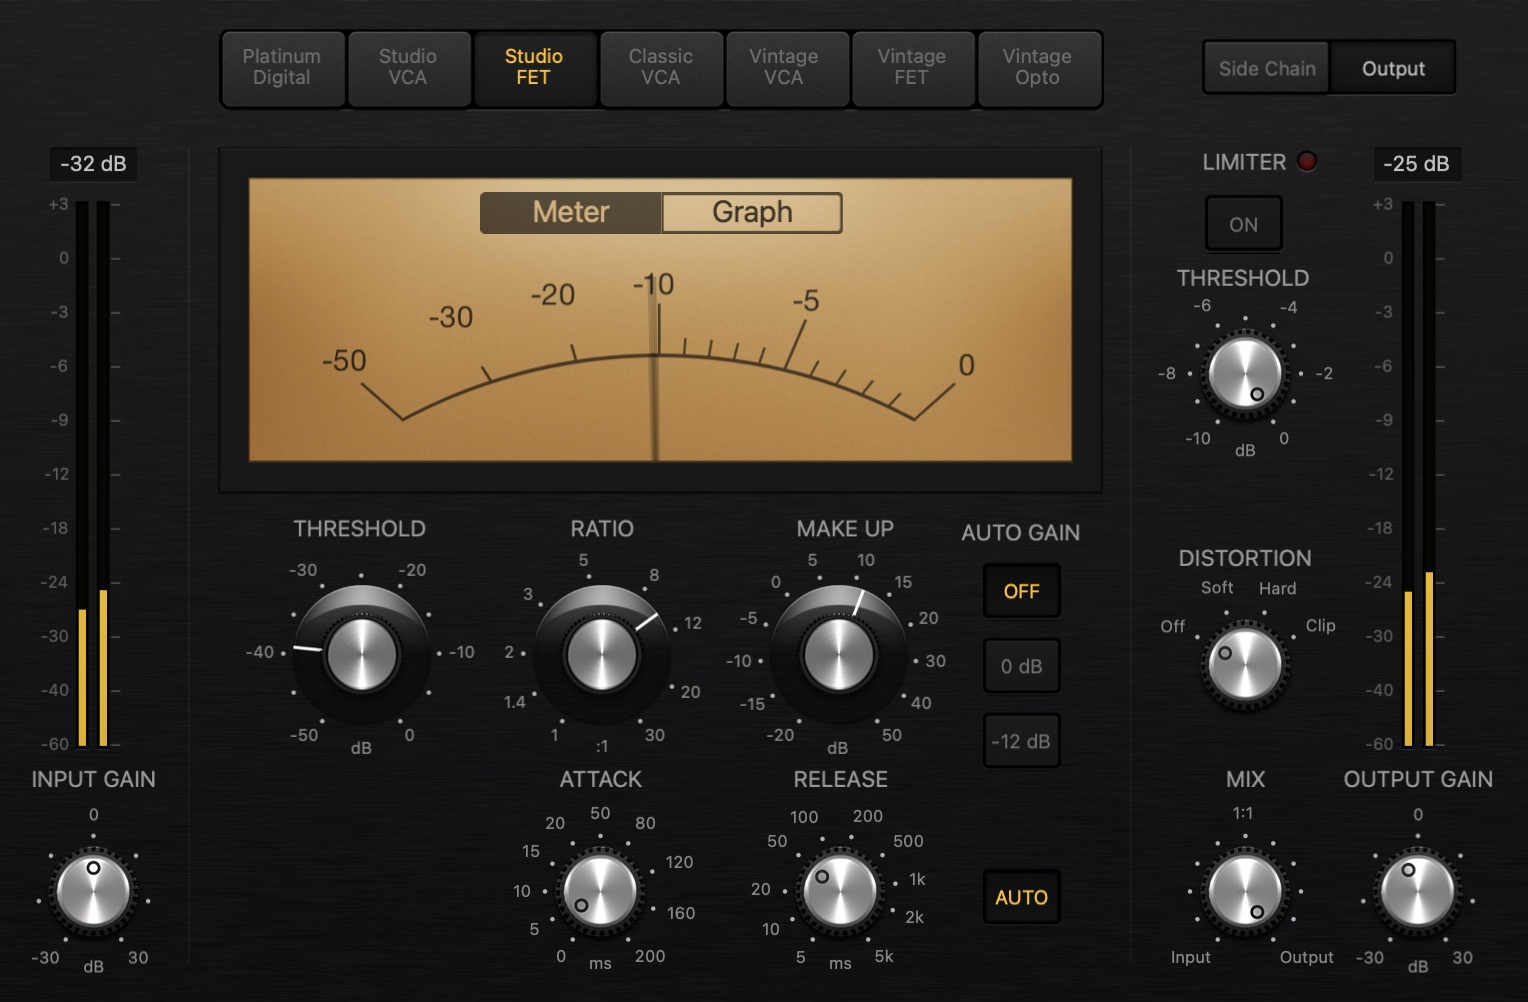
And that's it! Pretty simple.
Now we'll look at different ways you can use parallel compression in your mix...

Create Better Songs, Faster
Click below to download my free song-finishing checklist to help you create radio-ready songs without taking months to complete them.
How To Use Parallel Compression On The Mix Bus
You can actually add parallel compression to your entire mix in order to add thickness, character, and life. However, this can also ruin a mix, so the key is to be very subtle!
Again, you can simply throw some I Heart NY on your mix bus, or you set this up the traditional way.
Simply create a stereo aux track, and then use a send to send a copy of your mix bus to the aux track.
From there, simply add a compressor to the aux track and then blend the compressed signal with the dry.
Keep in mind that by adding in the compressed signal, you'll be making the overall volume of the track louder, so be sure to maintain unity gain by adjusting the output of the the parallel channel to ensure that the volume is the same with and without the parallel signal.
If your DAW doesn't let you create sends from your mix bus, again, you can simply add a compressor to the plugin chain that includes a mix knob.
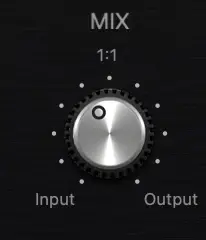
This way, you can simply turn up the knob to dial as much of the compressed signal as you want.
The more you turn up the knob, the more of the compressed signal you are getting.
Since this is on your mix bus, a little goes a long way, so you likely wont need to turn this up very much.
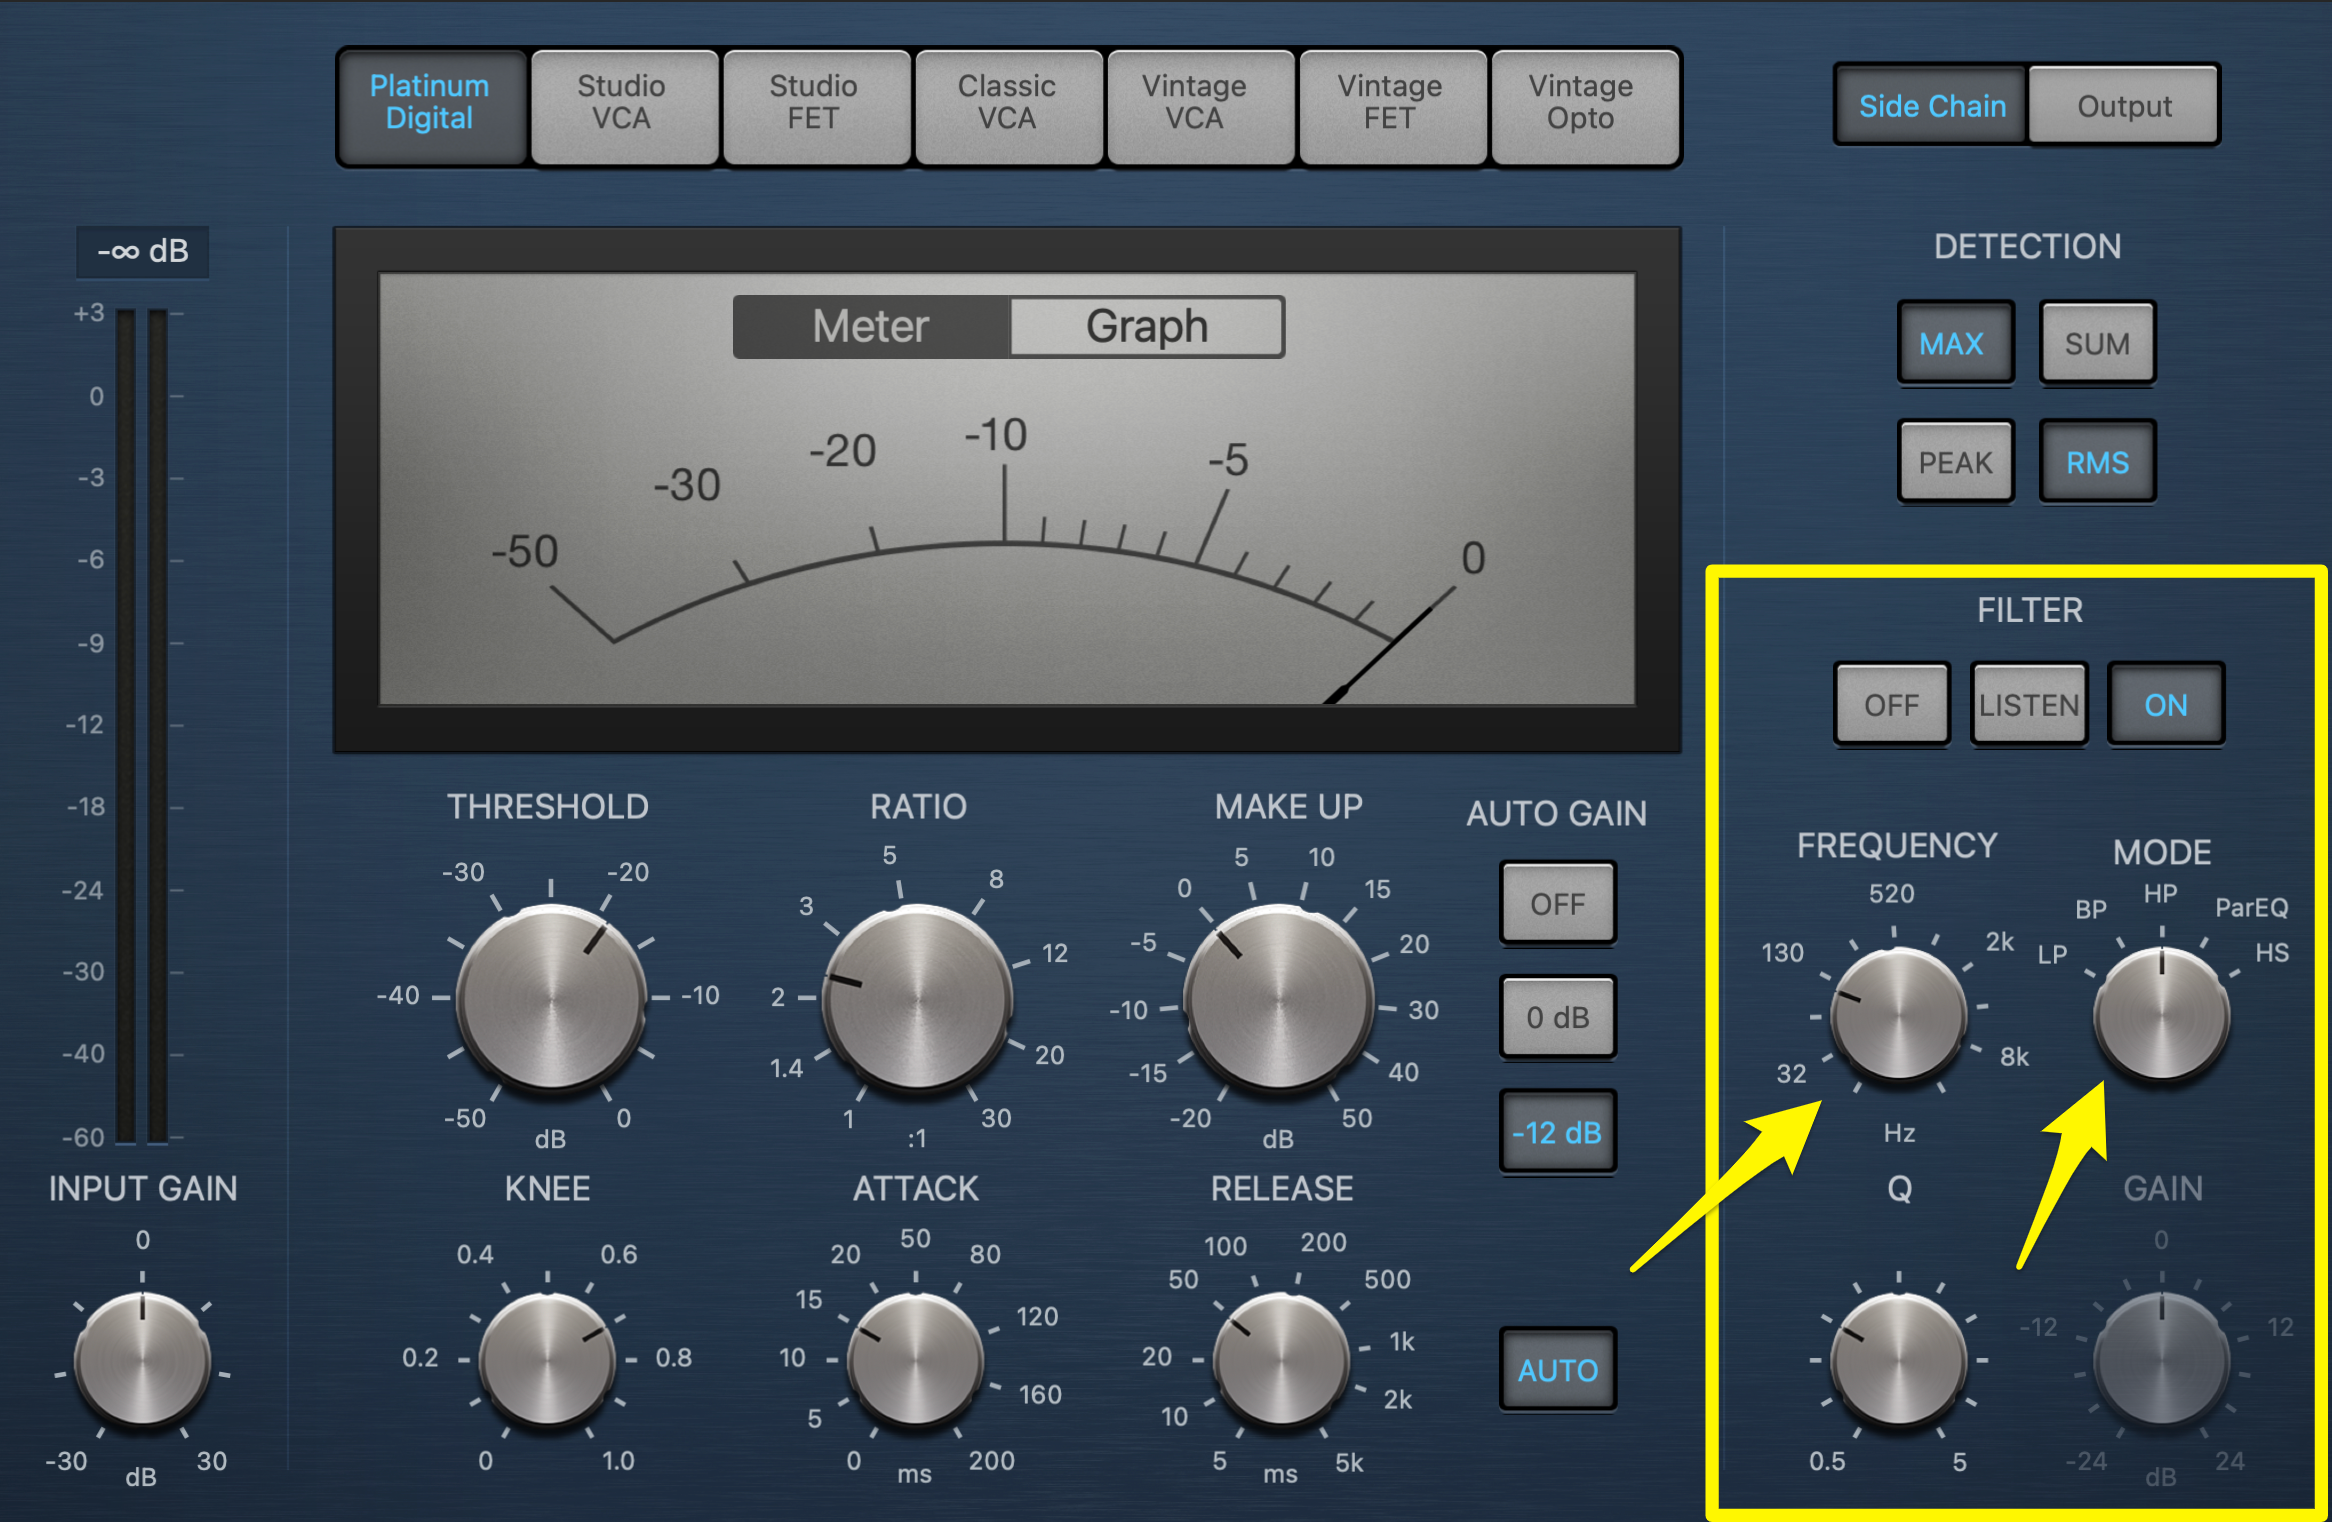
If your compressor has a high pass filter (HPF), it's a good idea to turn this on and set it around 100 Hz. This will prevent your low frequencies from being compressed, which will prevent your mix from gaining an unwanted pumping sound.
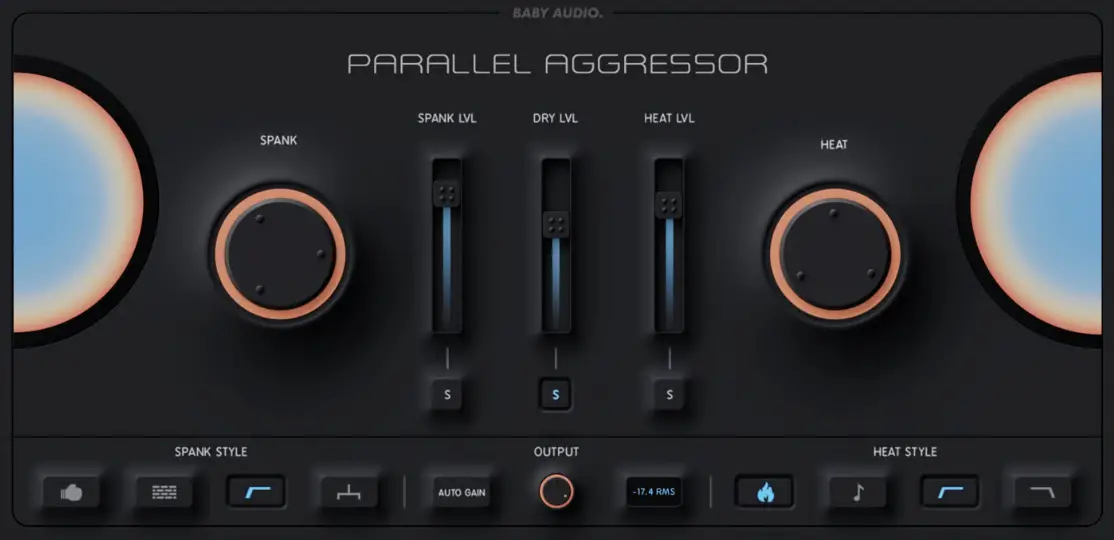
Another great plugin you can use is the Parallel Aggressor by Baby Audio.
Not only does this give you the ability to add parallel compression and high pass the low end, but you can also add in some parallel saturation as well.
You can see my full tutorial for how to use this plugin below:
Again, you can get 10% off all Baby Audio plugins by using my code (OAA) at checkout.
How To Use Parallel Compression On Drums, Guitars, Vocals, & Bass
How you apply parallel compression depends on the sound you're going for. Do you want a more natural-sound, or a more aggressive sound?
Here's how you would approach each of these desired results:
Natural-Sounding Compression
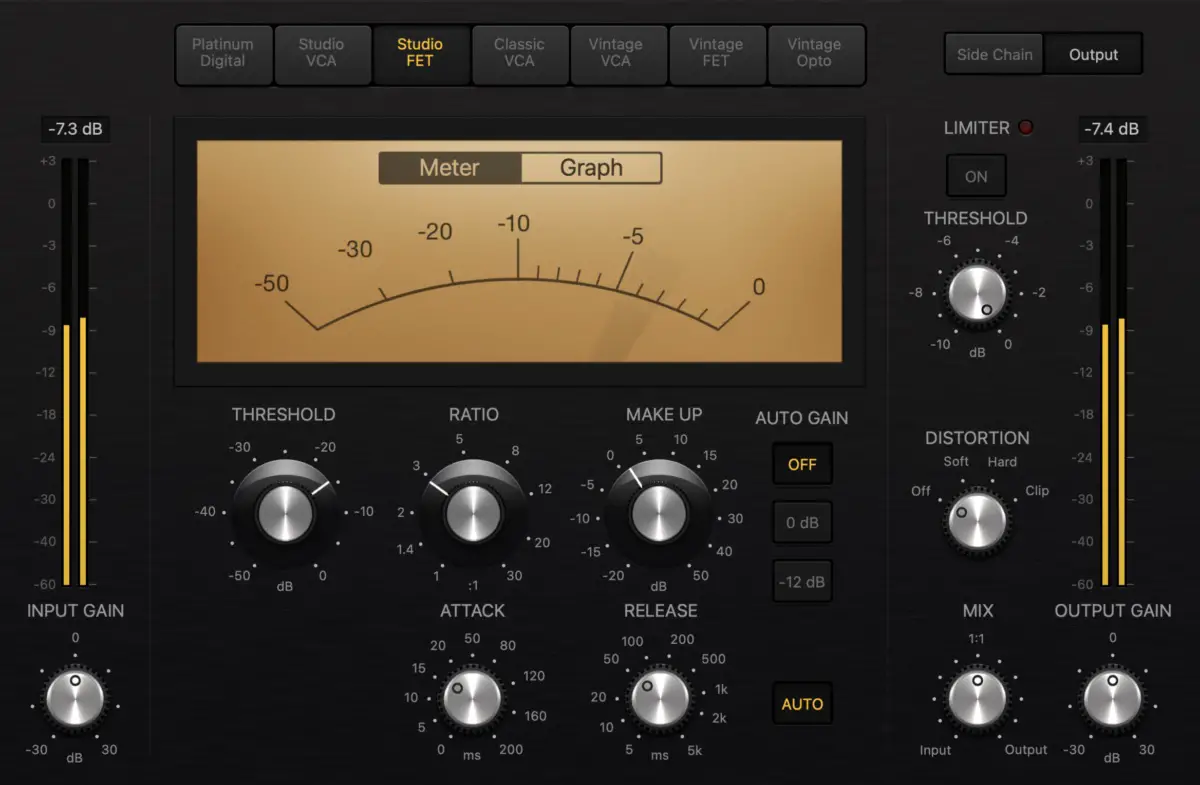
If you're looking for natural-sounding dynamic control, then try using a lower ration, such as 2:1 or 3:1.
Also set the threshold as low as possible, achieving only about 3-5db of gain reduction.
- Ratio: 2:1 or 3:1
- Threshold: 3-5 dB’s of gain reduction.
- Attack Time: Fast for thickness (2ms or less), slow for punchiness (10ms or more).
- Release Time: Auto or slow (above 100ms). It also helps if the release is timed to the song’s tempo. This bpm to milliseconds calculator will help.
- Gain: Bring the gain up until it’s about as loud as it was before. Always maintain unity gain!
As always, use your ears, and only consider these settings a starting point from which to adjust.
Aggressive-Sounding Compression
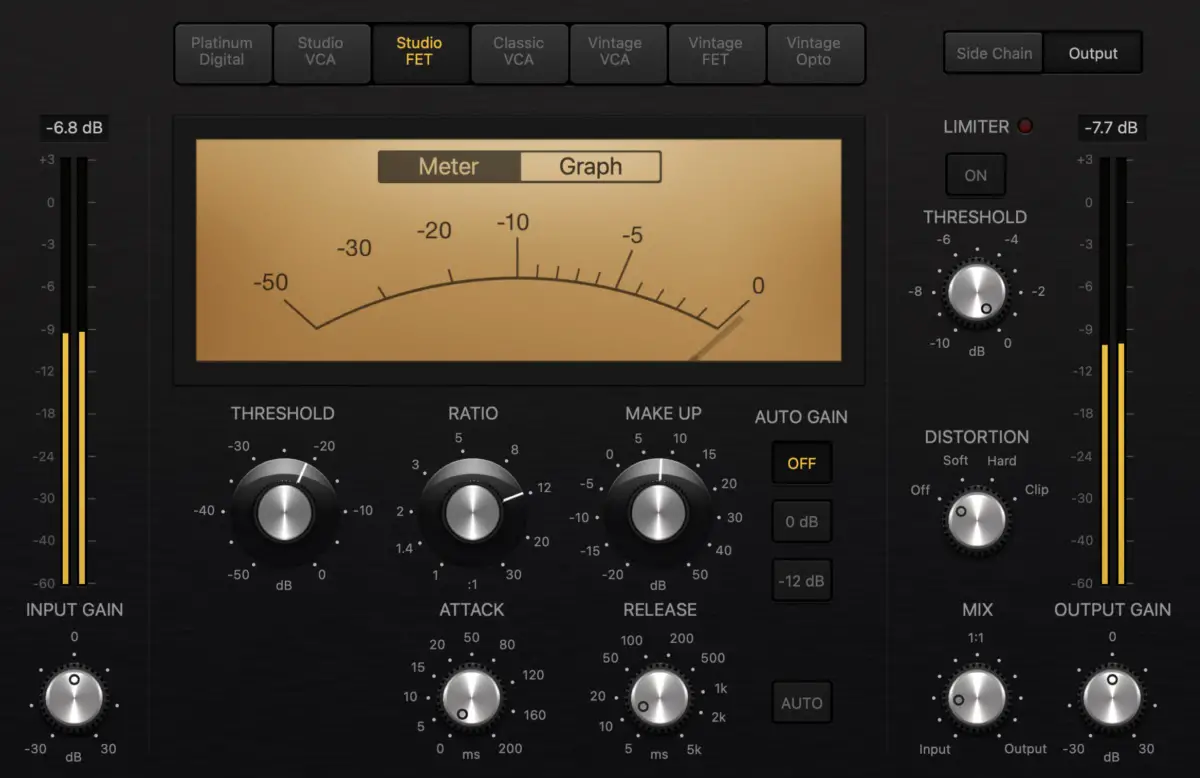
- Ratio: 8:1 to 30:1. I know, it seems crazy, but remember you'll only be dialing in a small amount of this compressed signal.
- Threshold: 5-15dBs of gain reduction
- Attack Time: 2ms or less
- Release Time: Around 60ms
- Gain: Bring the gain up until it’s about as loud as it was before. Always maintain unity gain!
Use Parallel Compression To Make ANY Instrument Sound Great
Subtle, natural-sounding parallel compression is a great technique for keeping a sound natural, while also helping it to sit well in a mix.
It doesn't work so well with drums or lead vocals, which both need aggressive parallel compression to sound good, but for everything else, you can apply natural-sounding, subtle parallel compression to help them sit well in the mix.
As always, use your ears, and don't use a technique just to use it. Make sure it actually sounds good!
Does parallel Compression Cause Phasing?
Parallel compression does NOT cause phasing issues because you are not combining two separate waveforms which could potentially clash and cancel each other out. With parallel compression, you are simply effecting a sound by using a copy of itself.
Phasing issues would only arise if there's delay caused by the compression, either from latency caused by a plugin compressor, or by a traveling in and out of the D/A converter.
In other words, you shouldn't have to worry about any phasing issues when using parallel compression.
Finish More Radio-Worthy Songs, Faster!
Parallel compression is just one piece of the puzzle when it comes to producing pro-quality songs.
If you want a proven step-by-step formula for mixing radio-worthy tracks from start-to-finish...
Create Pro-Mixes, Faster
Click below to download my free song-finishing checklist to help you create radio-ready songs without taking months to complete them.
This checklist will walk you through a proven step-by-step mixing and mastering process so that you don't ever have to guess or wonder what to do next.
You'll know exactly what to do, and when, so you can quickly mix, master, and finish more tracks.
I hope you found this post valuable on how to use parallel compression.
If so, feel free to share, and let me know in the comments below…
What other questions do you have about mixing or compression?
This post may contain affiliate links. If you purchase through one of my affiliate links, I'll earn a small commission at no extra cost to you.

