Ever wondered how you can get that big 80s snare sound for your next synthwave project?
Well, it's actually pretty simple.
To make an 80s snare sound...
Consider using two snare samples from an 80s drum machine (one for the top, one for the body), EQ each to taste, then send them both to a bus for compression. Finish off by sending that bus to a big plate reverb with a noise gate after it to create that signature "gated reverb" sound.
Sample Selection
Choosing the right snare samples for your 80s or synthwave snare sound is key.
In Logic Pro X, you can use the Linn Drum drum kick to quickly find snare samples that will work for synthwave.
Or, you could pick up BeatMaker Vice by Ujam...
Which is THE BEST synthwave drum synth/plug-in out there.
Or, if options 1 and 2 don't work for you, you can simply download my free pack of free synthwave drum sound samples below.
Free Synthwave Sample Pack
Just click the button below to download 191 synthwave drum and FX samples, and much more!
Layer Your Snare
Once you have your samples, it's time to start laying down those snare hits.
One thing you might want to consider doing is layering your snare. Meaning, use two snare samples instead of just one.
You especially will want to do this if you are using a drum kit with samples based on an 80s drum machine, because they tended to have two very different snare samples, one that was thinner but had more high-end crispness...
And a second snare sound that had more body, but didn't cut through as much.
So by using both, you can get the best of both worlds for big snare!
Snare 1 (Crispness)
So first, we're going to look at editing the first snare sample, the top.
EQ

Here I'm using some very gentle EQ with the Waves Vintage EQ 3.
I like this EQ because a small amount goes a long way, and it also helps add that vintage color to the sound.
I'm adding about a half db at 10khz, and cutting the same amount at 7khz.
This takes away a little bit of the harshness while keeping the brightness.
Bitcrush
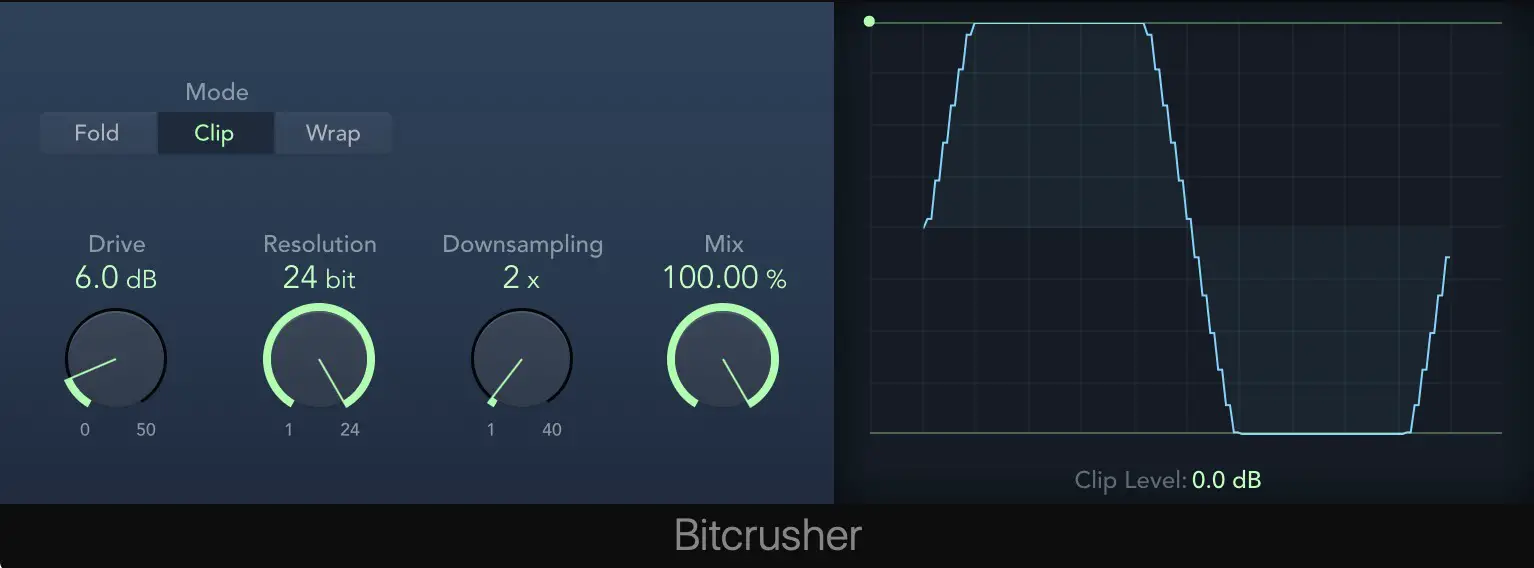
Next, I like to add some bit crushing, which further helps the snare cut through, and gain some crispness.
Eveloper
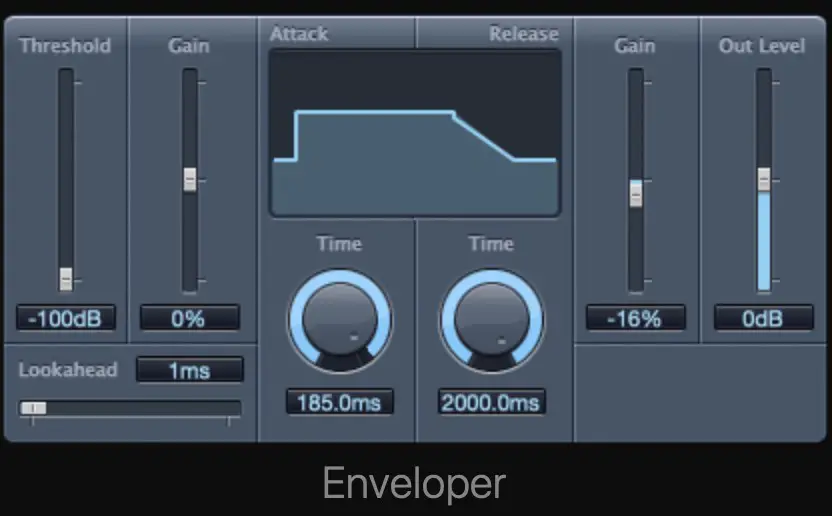
Finally, depending on your sample, you might want to reduce the sustain. There are other plug-ins out there that can do this, like Wave's Smack Attack, but I like to use the free Enveloper plug-in inside of Logic Pro X.
I pull up the "Room Killer" preset so that I'm reducing the sustain a bit on the snare, which allows it sound cleaner and punchier in the mix.
Snare 2 (Body)
With snare sample 1 done, it's time to move onto the second snare sample, which will be serving as the body of our snare sound.
EQ
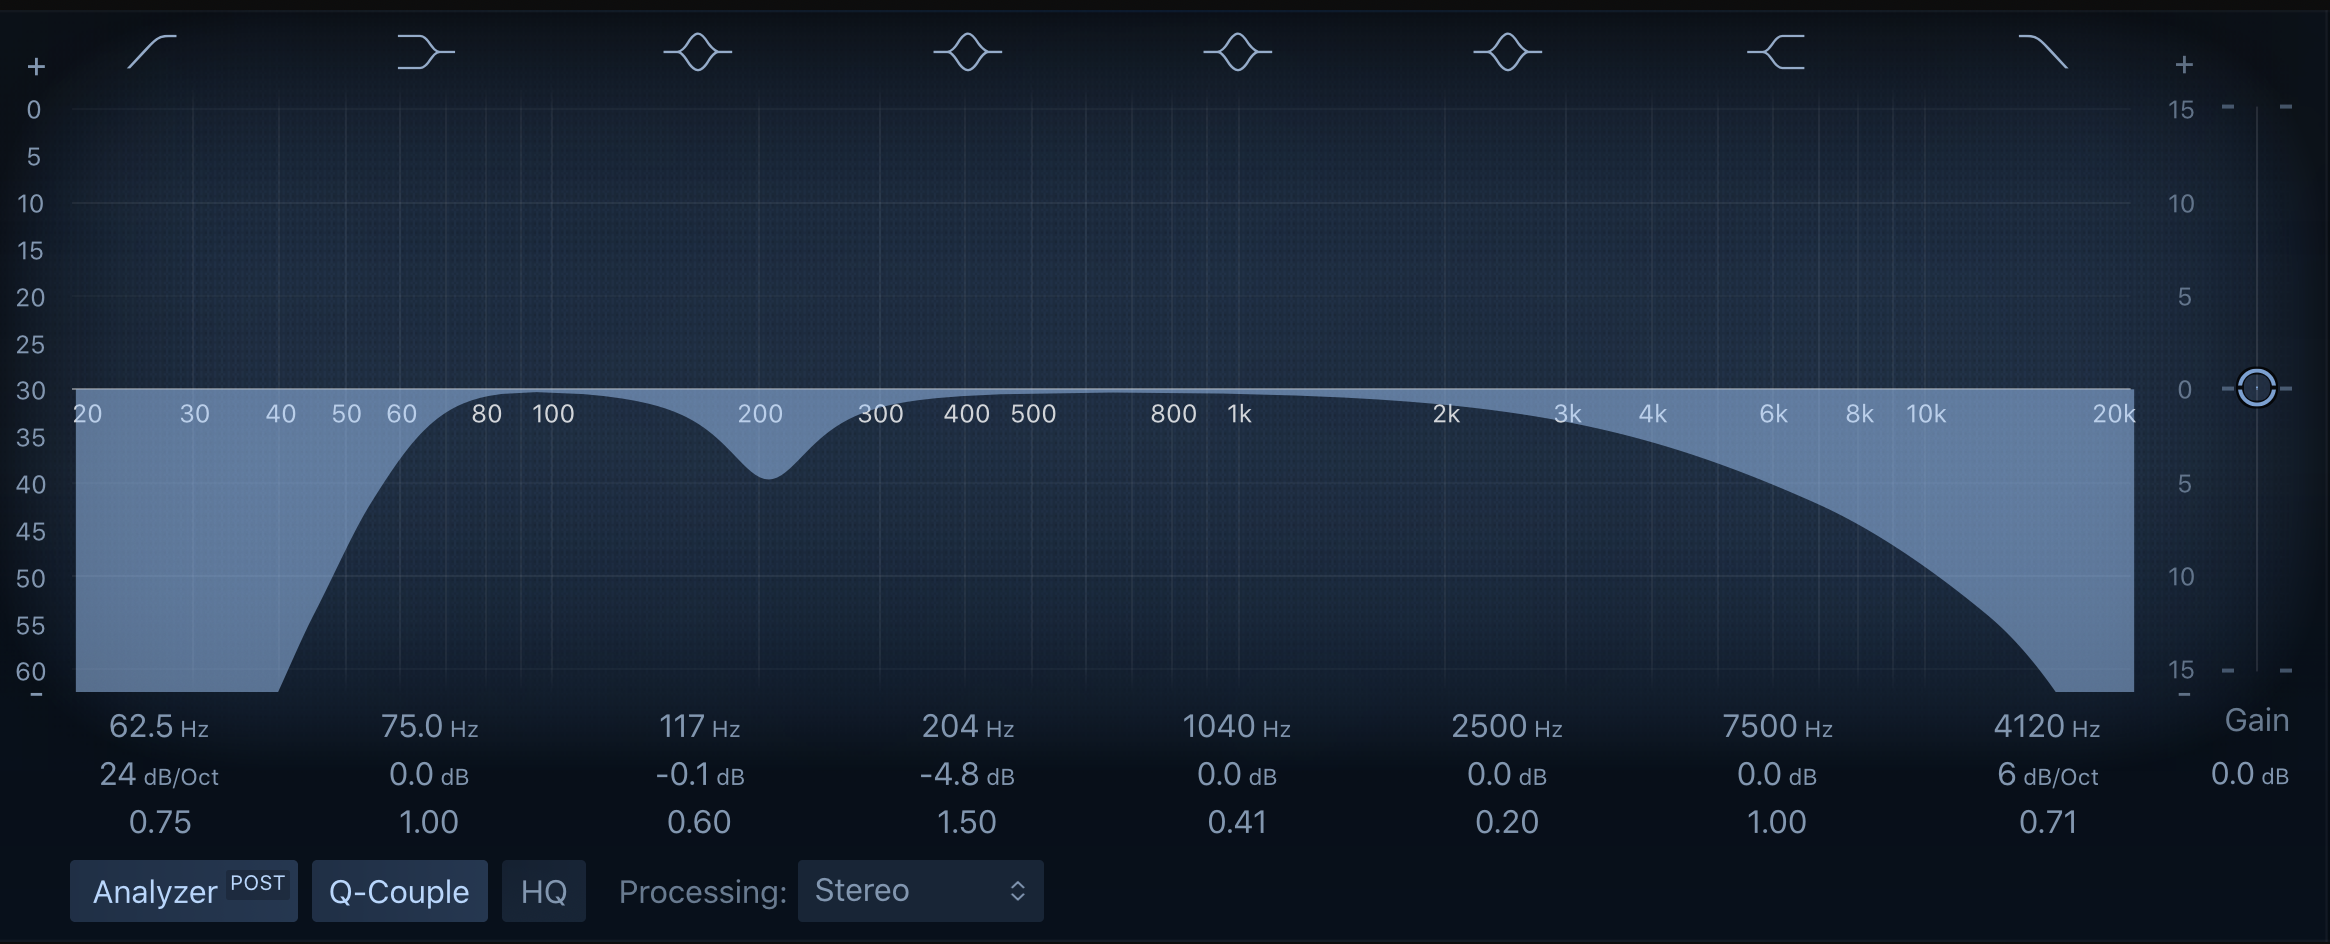
Again, the first thing we want to do is EQ.
This EQ will be pretty drastic because we only want the body, so we'll low cut and high cut this sample, and also cut out some of the low mids as well.
Snare Bus
With our individual snare samples done, it's time to glue them together with some snare bus compression.
Multiband Compressor
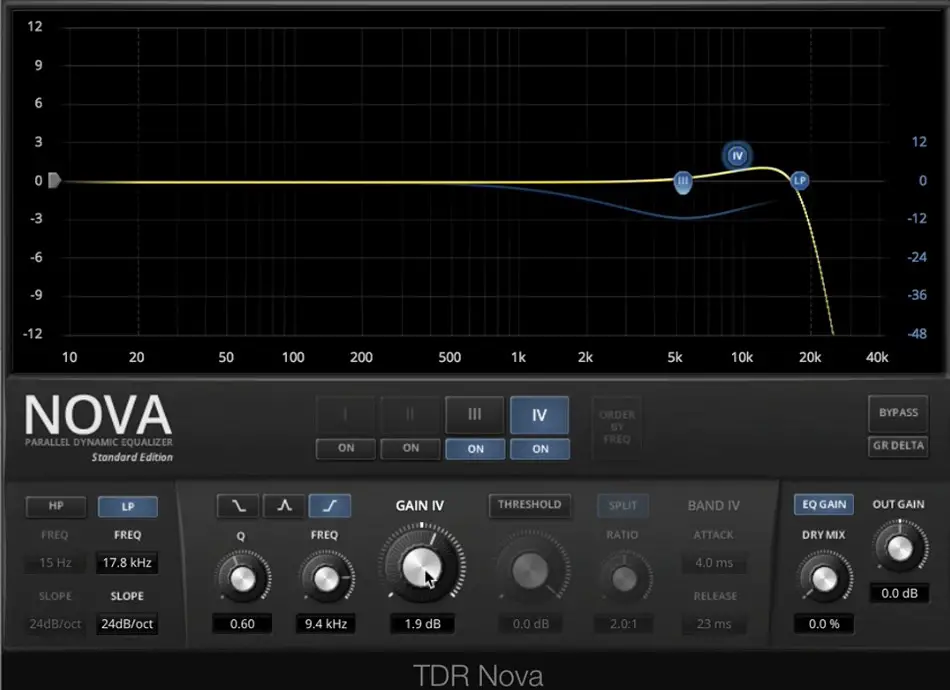
For this, you can use a free multi-band compressor called TDR Nova.
With this, we're simply cutting out the high, highs, providing a subtle shelving boost around 10k, and then applying some compression around 5k.
This will help the snare the cut through without clashing with the vocals or other lead instruments.
Send Snare Bus to a Reverb
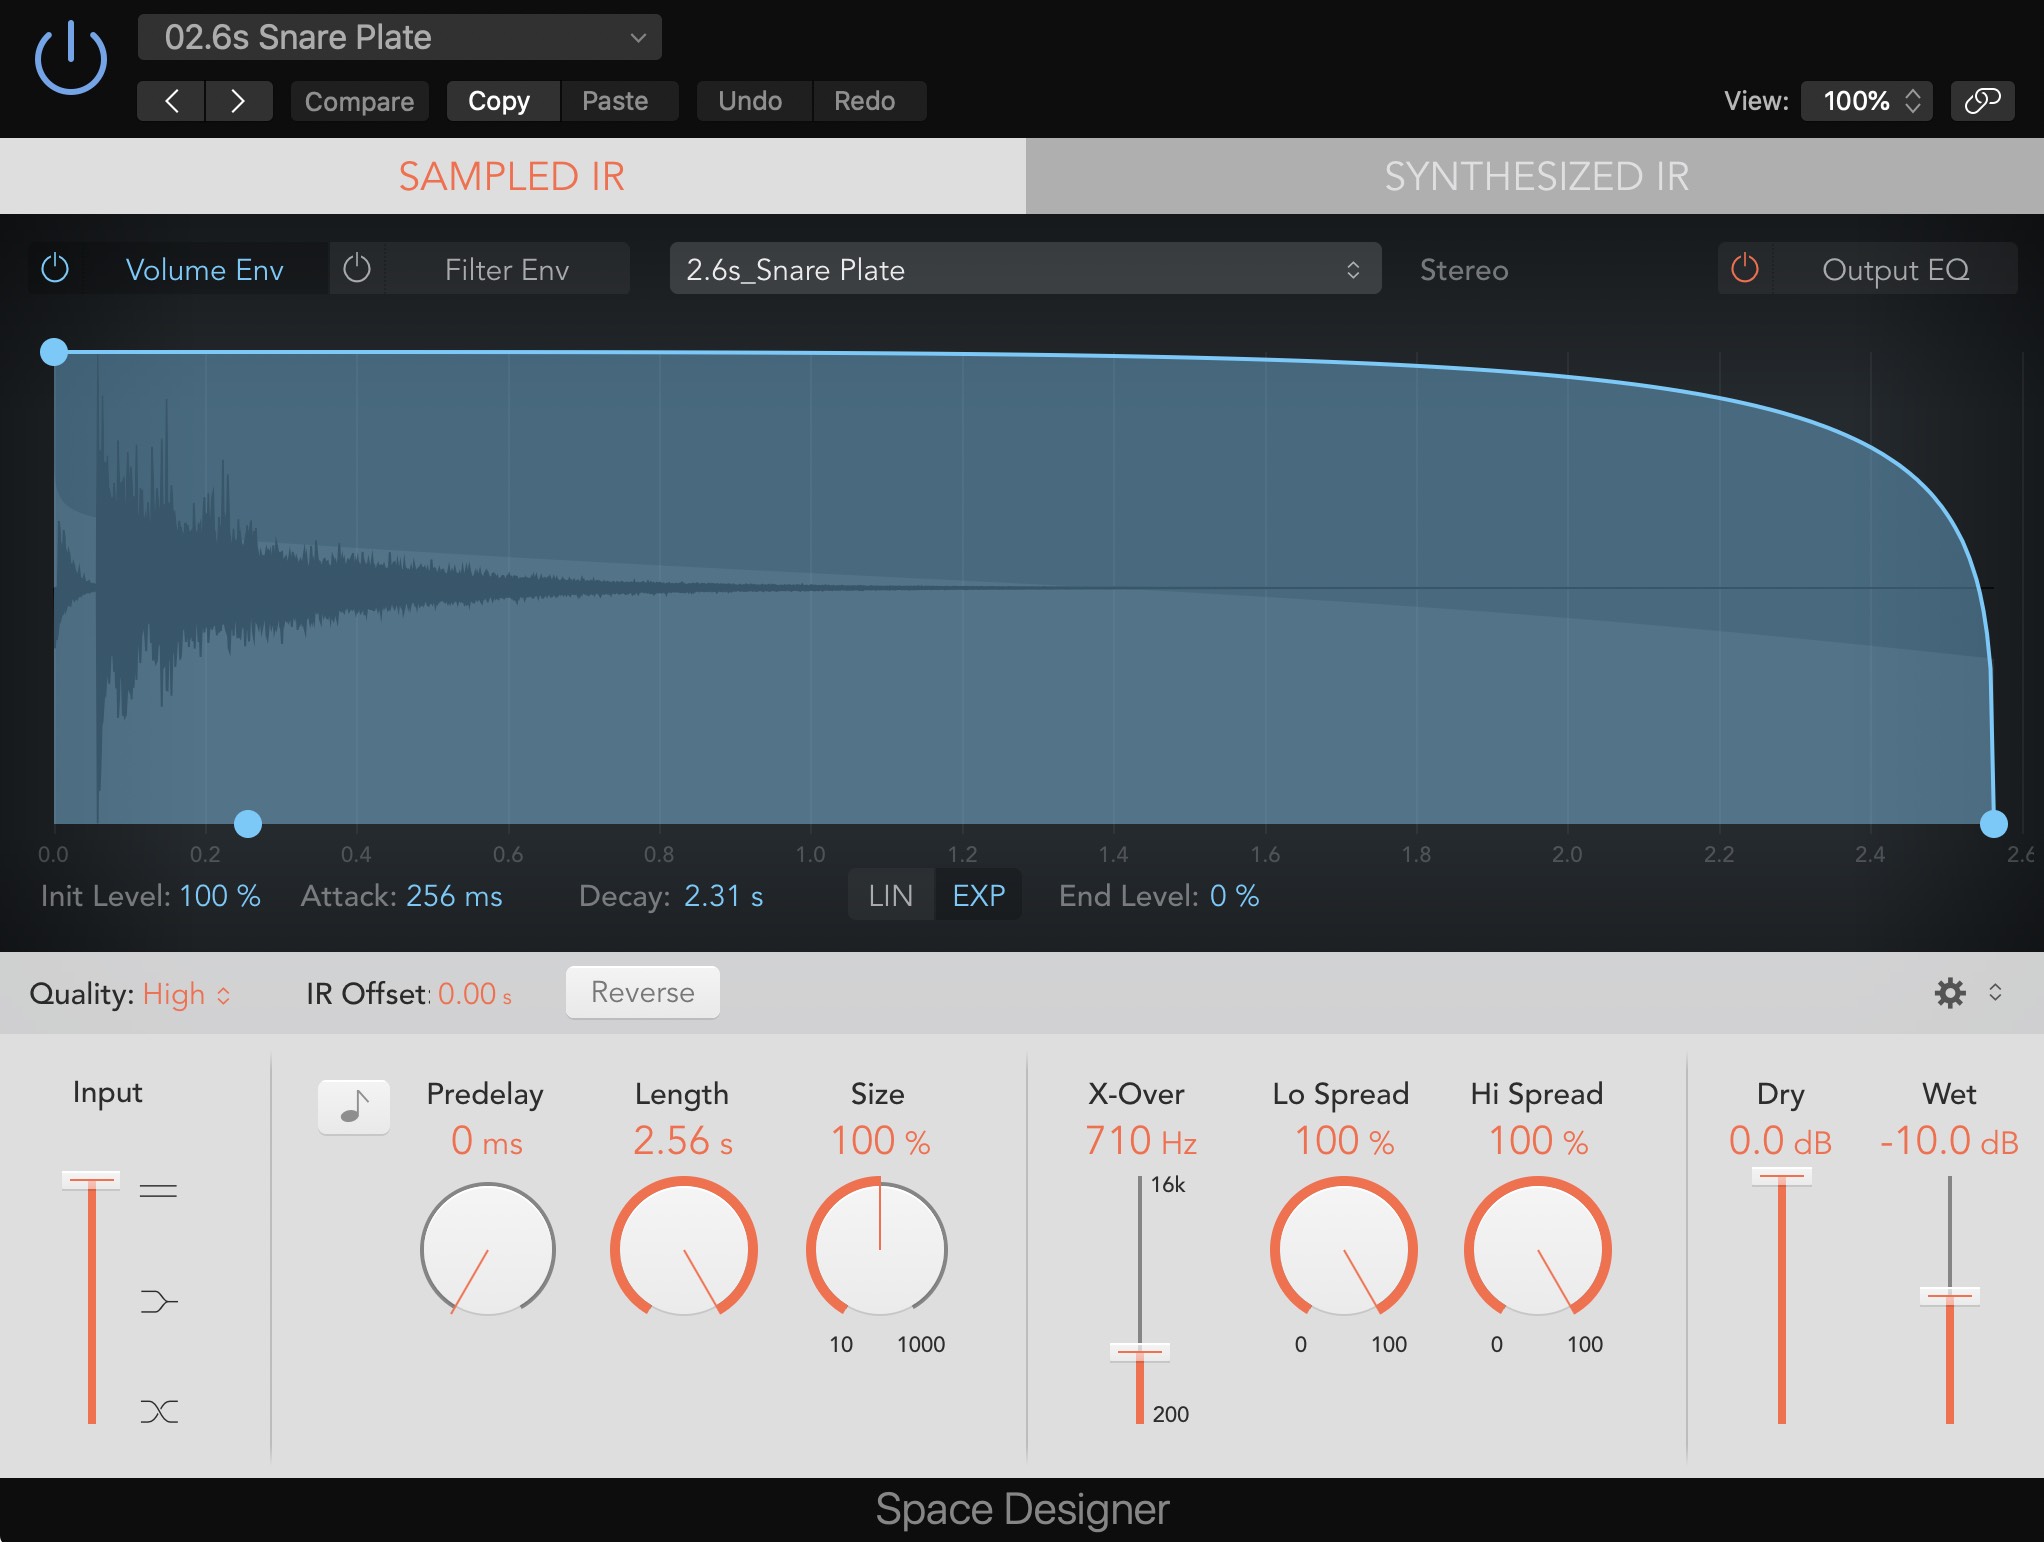
The final step is to create that classic "gated reverb" sound that was so prevalent in the 80s, and common in synthwave tracks.
For this, we'll simply use a send to send a copy of the snare bus to a reverb.
For this reverb, I'm using a plate reverb that is pretty big in size.
Add a Noise Gate After The Reverb

Last of all, we have to set up a noise gate to clamp down on that big reverb before it can ring out and clutter the mix.
You can see the settings I used in the picture above.
Conclusion
Of course, there is more than one way to make a synthwave snare sound, but your two key elements are picking the right sample, and adding that gated reverb effect.
Again, if you find yourself lacking for great synthwave or 80s drum samples, then be sure to grab my free 80s/synthwave drum sample kit below.
Free Synthwave Sample Pack
Just click the button below to download 191 synthwave drum and FX samples, and much more!
I hope you found this post on how to make a synthwave/80s snare sound helpful!
If so, feel free to share, and let me know in the comments below...
